One very cool feature of TMS RADical WEB (if not the main one) is that it allows Delphi developers to build Web applications that do not need a server connection. It's just HTML and JS files that run in the browser.
But we all know that there are some applications that need to retrieve data from somewhere, and also eventually persist data. We do not need a server to "run" the application, but we eventually might need communicate to a server to ask for data, perform centralized operations, authentication, etc.
While you can use any API server you want from the Web application, when using TMS XData to build the server your life will be way easier:
First, because with TMS XData you can write your backend server using Delphi and Pascal.
Also, because TMS XData is simply way too productive - it's very easy and fast to publish entities directly from database and to create service operations in a snap.
And, finally, because TMS XData provides first class support to TMS WEB Core, providing components that make it very easy and straightforward to connect to a XData server
The following screenshot shows the TMS XData Web Client demo in action. It's a sample that connects to a public XData REST server that holds information about music artists, albums, genres and tracks. With this demo you can retrieve and modify data from this server.
Note that this demo is dynamic. It means you can simply change the URL of server and it will work with any TMS XData Server you might have, regardless of the entities it publishes. The server provides the metadata for the whole API, and the client loads it at runtime allowing you to access the API in a very high level.
Also design-time components are available for you to simply assign properties and set handlers for the events that will fire when the server request is finished.
In case you're curious about how it's accomplished, here is the full source code for the implementation section of the single unit of the demo. The interface part was removed just because it's a bunch of declarations of the visual control fields.
procedure TForm1.btDeleteClick(Sender: TObject);
begin
  XDataWebClient1.Delete(SelectedEntitySet, TJSObject(TJSJSON.parse(DeleteMemo.Lines.Text)));
end;

procedure TForm1.btGetClick(Sender: TObject);
begin
  XDataWebClient1.Get(SelectedEntitySet, SelectedId);
end;

procedure TForm1.btListClick(Sender: TObject);
begin
  XDataWebClient1.List(SelectedEntitySet, edQuery.Text);
end;

function TForm1.SelectedEntitySet: string;
begin
  Result := cbEntitySets.Items[cbEntitySets.ItemIndex];
end;

function TForm1.SelectedId: Integer;
begin
  Result := StrToInt(edId.Text);
end;

procedure TForm1.ShowInfo(const Msg: string; Error: Boolean);
begin
  InfoLabel.Caption := Msg;
  if Error then
    InfoLabel.Font.Color := clRed
  else
    InfoLabel.Font.Color := clWindowText;
  InfoLabel.Visible := True;
end;

procedure TForm1.btPostClick(Sender: TObject);
begin
  XDataWebClient1.Post(SelectedEntitySet, TJSObject(TJSJSON.parse(PostMemo.Lines.Text)));
end;

procedure TForm1.btPutClick(Sender: TObject);
begin
  XDataWebClient1.Put(SelectedEntitySet, TJSObject(TJSJSON.parse(PutMemo.Lines.Text)));
end;

procedure TForm1.WebFormCreate(Sender: TObject);
begin
  ServerLabel.Caption := Format('XData Server URL: %s', [XDataConnection1.URL]);
  XDataConnection1.LoadModel;
end;

procedure TForm1.XDataConnection1ModelLoad(Sender: TObject);
var
  Container: TXDataEntityContainer;
  I: Integer;
begin
  Container  := XDataConnection1.Model.DefaultEntityContainer;

  cbEntitySets.Items.Clear;
  for I := 0 to Container.EntitySets.Count - 1 do
    cbEntitySets.Items.Add(Container.EntitySets[I].Name);
  if cbEntitySets.Items.Count > 0 then
    cbEntitySets.ItemIndex := 0;
end;

procedure TForm1.XDataWebClient1Error(Error: TXDataClientError);
begin
  ShowInfo(
    Format('%s. RequestId: %s. Code: %s. Request Url: %s',
      [Error.ErrorMessage, Error.RequestId, Error.ErrorCode, Error.RequestUrl]),
    True
  );
end;

procedure TForm1.XDataWebClient1Load(Response: TXDataClientResponse);
begin
  InfoLabel.Visible := False;
  if Response.RequestId = 'get' then
    GetMemo.Lines.Text := TJSJson.stringify(Response.Result)
  else
  if Response.RequestId = 'list' then
    ListMemo.Lines.Text := TJSJson.stringify(Response.Result)
  else
  if Response.RequestId = 'post' then
    ShowInfo(Format('New entity created in %s collection.', [SelectedEntitySet]))
  else
  if Response.RequestId = 'put' then
    ShowInfo(Format('Entity updated in %s collection.', [SelectedEntitySet]))
  else
  if Response.RequestId = 'delete' then
    ShowInfo(Format('Entity removed from %s collection.', [SelectedEntitySet]));
end;
Get started today: Technical previews of TMS WEB Core, TMS FNC UI web-enabled controls, web-enabled TMS XData, the first parts under the TMS RADical WEB umbrella are exclusively available now for all active TMS-ALL-ACCESS customers.
In November 2016, I created a presentation for Embarcadero CodeRage about creating FNC custom controls. You can find this presentation including its source code here:
https://community.embarcadero.com/blogs/entry/developing-user-interface-controls-for-both-vcl-and-fmx-with-bruno-fierens
Unless you have been living under a rock the past 2 weeks, you have most certainly seen we have recently introduced the technology preview of TMS WEB Core and with that also the news that the TMS FNC framework is now also web-enabled. So, I thought it was a good moment to revisit this November 2016 CodeRage presentation and see how applicable it still is for creating custom TMS FNC UI controls, but this time for using this in the web!
The good news is that this took me less than 10 minutes to get the original custom TMS FNC UI control I created for VCL, FMX and LCL now also working for the web.
So, what did I have to do?
I started from the unit VCL.TMSFNCFancyTrackbar that contained the source code for the VCL variant of the FNC Fancy trackbar control. I renamed this file VCL.TMSFNCFancyTrackbar to WEBLib.TMSFNCFancyTrackBar.pas as WEBLIB is the prefix for the namespace for the web variant of the FNC controls. Further, for this small test, I manually renamed the unit references in the uses list in WEBLib.TMSFNCFancyTrackBar.pas.
I did not touch any other part of the code. Next, I copied the code to instantiate this custom control TTMSFNCFancyTrackBar from the test project to the TMS WEB Core test project:
As I knew my app was going to need a PNG file for the trackbar background and the trackbar thumb, I copied the PNG files to the folder where the web application is deployed and from where its files are being served to the browser. 5 minutes later, the web application was running and resulted in:
So, a kind of half working trackbar. The tickmarks are displayed and the position value as well but my trackbar background and trackbar thumb were missing.
Then it dawned on me that the most likely reason of the issue was that my custom control didnt have OnChange handlers for the TTMSFNCBitmap classes that were used as class properties to hold the trackbar background and thumb. When using the code in a native client application, the loading of the images from file is instant and thus, when the native app starts, the images are loaded and being used immediately to paint the control. So, I had never noticed this before.
In the web this is different. Under the hood, we have implemented TMSFNCBitmap.LoadFromFile() via asynchronous loading of the image file via an XMLHttpRequest() object. This means there is no instant synchronous loading and therefore it means that I need to signal the custom control to refresh itself when the images are loaded. This is achieved by assigning an event handler to the TTMSFNCBitmap.OnChange event and from there, Invalidate the control.
With this inplace, the TTMSFNCFancyTrackbar custom control looks 100% identical to the native versions created earlier for VCL, FMX and LCL applications:
and yes, also the interaction with keyboard and mouse work fine.
If you already embarked on creating custom FNC controls, this means there is excellent news. With little or no effort, you will be able to use these custom FNC UI controls also in your web applications created with TMS WEB Core!
The full source code of the web version of the TTMSFNCFancyTrackbar can be downloaded here but you can as well easily play with it directly from your browser in this demo app: http://www.tmssoftware.biz/tmsweb/demos/tmsweb_customcontrol/
Well, this is just one approach for creating custom UI controls for TMS WEB Core. This approach offers you to create controls pretty much with the same UI control model as you could from Delphi 1. In another upcoming blog article, we'll present an entirely different way for creating custom UI controls where the control will be fully built-up from HTML elements!
Get started today: Technical previews of TMS WEB Core, TMS FNC UI web-enabled controls, web-enabled TMS XData, the first parts under the TMS RADical WEB umbrella are exclusively available now for all active TMS-ALL-ACCESS customers.
Weve been overwhelmed by the enthusiasm of many users about the news of TMS WEB Core and also the many reactions, feedback, comments of users who immediately got their hands wet with the technology preview.
From all feedback received combined with our internal planning, were pleased to inform that there is now a technology preview update available that brings not only many small improvements but also some exciting new features!
The highlight of the technology preview update is the introduction of the jQWidgets jQxGrid UI control. This control can now be easily used from your Pascal code from a TMS WEB Core application. jQxGrid is a high performance jQuery grid with paging, sorting, grouping, editing & filtering capabilities. It also features different column types.
If you get TMS WEB Core 0.9.2 you can start playing with the new grid right-away or you can explore the grid via the online demo.
Second new big feature is that now data-modules, i.e. the TWebDataModule, are also available. The same easy-to-use centralized place for databinding & business logic that we are used to in Delphi VCL or FMX applications is now also available in TMS WEB Core applications.
Also new is a Twitter feed display component. Showing your personal or company Twitter feed integrated in your web application is now as easy as dropping a component and setting your feed name.
Weve also made it easier to use cookies and query parameters directly from your Pascal code. Getting or settings cookie values is now very easy. You can use code like:
Cookies.Add(CompanyNameCookie,tmssoftware, Now + 5000);
Cookies.Add(UserNameCookie,Bruno Fierens, Now + 5000);
Cookies.SetCookies;
And there is more!
The IDE integration was also improved with built-in automatic listing of CSS style classnames or HTML element IDs, so you can pick directly from the Object Inspector what CSS style from your HTML template you want to assign to a control or to what HTML element you want to link a control.
Other than this there are numerous smaller improvements in aligning, splitter, Google Maps geolocation, Google maps route display,
Well keep you posted with more updates as we continue to execute the planning and we look forward to hear all your feedback!
Get started today: Technical previews of TMS WEB Core, TMS FNC UI web-enabled controls, web-enabled TMS XData, the first parts under the TMS RADical WEB umbrella are exclusively available now for all active TMS-ALL-ACCESS customers.
Last week, our team was brainstorming and as usual, lots of interesting and cool ideas come up. Based on these ideas, we have some more exciting technology being worked on now and coming up soon and youll learn about it here shortly. But, from time to time, there are also fun ideas that come up during our brainstorm sessions. One such idea was to check if it wouldnt be possible to port an existing Pascal game to TMS WEB Core and this way, make the game available via our website for playing it directly online. We thought this was not only a good idea but also a perfect validation to see how well our TMS WEB Core performed in enabling Delphi developers to move existing code over to the web. So, our software architect Pieter Scheldeman, also the architect of the cross-framework, cross-platform FNC framework, searched for some open-source Pascal games. One of the games Pieter found was the Tetris game in the Bianco Games collection from Marco Bianchini: https://torry.net/authorsmore.php?id=800
After checking out the source code of the Tetris game a bit, we were amazed that after less than 30 minutes of work by Pieter, the game was already running in the browser!
The game does all its painting via the Delphi TCanvas in a custom control. As TMS WEB Core introduces a TCustomControl class with access to a TCanvas object with the same interface as the Delphi TCanvas, the control in which the Tetris blocks fall was working quickly with almost no code changes in the web. It shows the strength of the Pascal to Javascript compiler combined with the component framework we have designed for it.
Have fun playing the Tetris game without needing to install it on your machine. Were curious and eager to learn if you have more cool challenges to validate our TMS WEB Core technology against.
Get started today: Technical previews of TMS WEB Core, TMS FNC UI web-enabled controls, web-enabled TMS XData, the first parts under the TMS RADical WEB umbrella are exclusively available now for all active TMS-ALL-ACCESS customers.
In a previous blog, it was demonstrated how custom controls for TMS WEB Core could be created using the FNC framework and how easy it was to use FNC code that was written for VCL, FMX or LCL applications also for web applications.
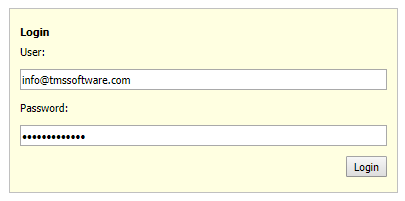
In this article, we want to cover custom controls from an entirely different angle. That means custom controls that are built from a hierarchy of HTML elements. The example via which we want to explain building such custom controls is about a commonly used UI concept in web development, i.e. a login panel. This is where the user enters his username & password to authenticate. So, in this article, well show the details how to make a TMS WEB Core custom UI control that represents such reusable login panel.
In terms of HTML, the login panel consists of an outer DIV element. In this DIV, we put different DIV elements to hold label text to indicate where the username HTML INPUT element is and where the password HTML input element is. Finally, there is a HTML BUTTON used to confirm the actual entry and do a login.
From a TMS WEB Core custom control perspective, this means we will create a Pascal class descending from TCustomControl and well override the CreateElement virtual method. This CreateElement virtual method is what is responsible for returning the hierarchy of HTML elements representing the UI control. In this case, the code for CreateElement is:
Here FCaption, FUserLabelSpan, FUserInput, FPasswordLabelSpan, FPasswordInput and FButton are Pascal references to the HTML elements SPAN, INPUT and BUTTON used in the control.
You can see that the HTML elements are created with document.createElement(). This is almost as if one would do this in Javascript, but via the Pascal to Javascript compiler, you can see the DOM object document can be used as Pascal object.
One more note about the CreateElement method, you can see that the purpose of the last line in the method:
FButton.addEventListener('click', @HandleLoginClick);
is to attach a TLoginPanel method HandleLoginClick to the HTML element onclick event handler.
The HandleLoginClick method is declared as
function HandleLoginClick(Event: TJSMouseEvent): Boolean; virtual;
To see how this HTML element event handler is eventually hooked up to trigger the TLoginPanel.OnLogin event, see this code snippet from the TLoginPanel class:
TLoginPanel = class(TCustomControl)
private
    FOnLogin: TNotifyEvent;
    function HandleLoginClick(Event: TJSMouseEvent): Boolean; virtual;
protected
   procedure DoLogin; virtual;
published
    property OnLogin: TNotifyEvent read FOnLogin write FOnLogin;
end;

function TLoginPanel.HandleLoginClick(Event: TJSMouseEvent): Boolean;
begin
  DoLogin;
end;
procedure TLoginPanel.DoLogin;
begin
  if Assigned(OnLogin) then
    OnLogin(Self);
end;
To interface our Pascal class with the HTML elements two more virtual method overrides are important. There is the UpdateElementVisual method and the UpdateElementData method. The purpose of the UpdateElementVisual method is to do changes to HTML element properties that affect the UI control visually. The UpdateElementData method is to do changes with respect to data contained in the HTML elements.
For this TLoginPanel control, we expose a few properties to set captions for labels in the UI control as well as the values of the HTML INPUT elements for username and password.
The properties of the TLoginPanel used for the login panel data are:
procedure TLoginPanel.UpdateElementData;
begin
  inherited;
  FUserLabelSpan.innerHTML := FUserLabel;
  FPasswordLabelSpan.innerHTML := FPasswordLabel;
  FButton.innerHTML := FLoginLabel;
  FCaption.innerHTML := FCaptionLabel;
  (FUserInput as TJSHTMLInputElement).value := FUser;
  (FPasswordInput as TJSHTMLInputElement).value := FPassword;
end;
To customize the look and feel of the login panel, there is a dual approach. The first and classic Pascal like approach is the basic properties are defined to set the background & border color of the panel and the padding and margin of the controls within the panel. The second approach is that the CSS class can be set for the HTML elements used and that also via CSS full customization of look and feel is possible. This leaves the choice to either stick to classical Delphi style RAD development and do all from the form designer or work with separate CSS and perhaps leave the styling to a graphic designer instead of letting the developer do everything.
The visual properties exposed for the TLoginPanel class are:
The Element*ClassName properties allow to set CSS class names for the control itself (outer DIV), the SPAN elements for the labels associated with the INPUT elements and of course of also for the HTML INPUT and BUTTON elements.
The UpdateElementVisual override becomes:
procedure TLoginPanel.UpdateElementVisual;
var
  strpadding,strmargin: string;
begin
  inherited;
  if Assigned(ElementHandle) then
  begin
    strpadding := IntToStr(Padding)+'px';
    strmargin := IntToStr(Margin)+'px';
    ElementHandle.setAttribute('class',ElementClassName);
    if (ElementClassName = '') then
    begin
      ElementHandle.style.setProperty('background-Color',ColorToHTML(Color));
      ElementHandle.style.setProperty('border', 'solid 1px '+ColorToHTML(BorderColor));
      ElementHandle.style.setProperty('padding',strPadding);
    end;
    ElementHandle.style.setProperty('display','table');
    FCaption.setAttribute('class',ElementCaptionClassName);
    if (ElementCaptionClassName = '') then
    begin
      FCaption.style.setProperty('margin-top',strMargin);
      FCaption.style.setProperty('margin-bottom',strMargin);
      FCaption.style.setProperty('font-weight','bold');
    end;
    FUserInput.setAttribute('class',ElementInputClassName);
    FPasswordInput.setAttribute('class',ElementInputClassName);
    if (ElementInputClassName = '') then
    begin
      FUserInput.style.setProperty('margin-top',strMargin);
      FUserInput.style.setProperty('margin-bottom',strMargin);
      FPasswordInput.style.setProperty('margin-top',strMargin);
      FPasswordInput.style.setProperty('margin-bottom',strMargin);
    end;
    FUserInput.style.setProperty('width','100%');
    FUserInput.style.setProperty('display','table-cell');
    FPasswordInput.style.setProperty('width','100%');
    FPasswordInput.style.setProperty('display','table-cell');
    FUserLabelSpan.setAttribute('class',ElementLabelClassName);
    FPasswordLabelSpan.setAttribute('class',ElementLabelClassName);
    if (ElementLabelClassName = '') then
    begin
      FUserLabelSpan.style.setProperty('margin-top',strMargin);
      FUserLabelSpan.style.setProperty('margin-bottom',strMargin);
      FPasswordLabelSpan.style.setProperty('margin-top',strMargin);
      FPasswordLabelSpan.style.setProperty('margin-bottom',strMargin);
    end;
    FButton.setAttribute('class',ElementButtonClassName);
    if (ElementButtonClassname = '') then
    begin
      FButton.style.setProperty('margin-top',strMargin);
      FButton.style.setProperty('margin-bottom',strMargin);
    end;
    FButton.style.setProperty('float','right');
  end;
end;
Notice how the properties are set when no CSS class is specified for HTML elements or otherwise the look and feel will be determined by the CSS.
The result becomes:
This is the basic look and feel without CSS.
Now, lets bring bootstrap CSS and some custom CSS in the game and see the new look and feel.
We have only scratched the surface here of the many possibilities to enrich the TMS WEB Core framework with custom UI controls but we hope we have generated interest and enthusiasm.
Get started today: Technical previews of TMS WEB Core, TMS FNC UI web-enabled controls, web-enabled TMS XData, the first parts under the TMS RADical WEB umbrella are exclusively available now for all active TMS-ALL-ACCESS customers.
The order that units appear in the code could facilitate or not the maintenance.
In that article, I will show you what order I use to declare units in my own projects.
Compiler
The units, also known as modules, compose the projects.
Every project must be divided into logical units and make that division it's not always easy, because it involves an abstract and logical level of thinking.
After dividing the project units, we also need to concern with third-party units.
Nowadays it's almost mandatory that we use lib's and frameworks. Mostly, they are Open Source projects.
Such third-party units make our work easier, as they already have ready-made artifacts that speed up the development of projects.
In addition to these third-party units, we also have the default units located in Run-time Library (RTL) or VCL/LCL, which have many interfaces, classes, functions, and artifacts, ready-to-use.
So, what order we should declare such units in our code?
Here is the order that I propose:
    unit MyUnit;
    uses
      // 1. fpc/lazarus/delphi units,
      // 2. 3rd units,
      // 3. my open source units,
      // 4. project units
When the compiler starts parsing your code and it arrives at MyUnit, it will read the units in the sequence in which they were declared there may be some optimization, but the important thing is the final result, which depends on the order above and the identifiers (classes, interfaces, functions/procedures, variables and constants) will be "stored in order" in which they were declared.
So, I propose to declare, initially, all units that are standard to the compiler and IDE. Then, all third-party units such as libs and frameworks. After, all units referring to your public projects, be them OpenSource or shared within sectors of your company. Finally, we declare all units of the project itself, that is, the project we are currently working on.
And why is this important?
The reason is because the compiler needs to know in which unit a particular artefact (class, function, etc) is located.
The rule is that:
If you have 3 units (Unit1, Unit2 and Unit3 ) and each has a class named TFoo, the compiler will "inform" your code that TFoo is located in the last declared unit.
For example:
    uses
      Unit1, Unit3, Unit2;
Notice that I reversed the numerical order. First is 1, then 3, and finally 2.
Where is located TFoo class when you'll use it in yourMyUnit?
The answer is: In Unit2.
Because it was declared by last.
Imagine that the compiler is putting a reference table into memory for all the identifiers it finds. First, it finds TFoo when it reads Unit1. Then, it finds it again when it reads Unit3. At this point it overrides the reference that says that TFoo is in Unit1, because it is now in Unit3. Finally, when it reads Unit2 the identifier is repositioned again.
If in that same MyUnit I need to use TFoo from Unit1, I am required to qualify the class with the unit name instead of just using identifier:
In the Object Pascal language we have two places (sections) where we can declare the units that will be used.
We can declare in the interface section or in the implementation section.
Is it worth declaring Units in the implementation section?
In my opinion, no.
In doing so, you will have 2 places to organize the precedence of the Units, meaning you will have more work.
Because the Object Pascal language does not support Circular Reference between Units, one of the reasons for having the option to declare Units in the implementation section is to allow this bi-directional reference between them. However, this also indicates a bad design in the division of the project units.
Conclusion
Defining the order of declaration of the units in each unit of your project can be extremely important to facilitate maintenance and organization.
As you add new identifiers, you will be sure that the compiler will give you "priority" to use the identifiers for your project, without having to prefix it with the unit name.
If you add some identifier and it conflicts with another unit that has the same name, simply prefix that identifier with the name of the unit, either from third parties or from the environment itself. However, this conflict will not exist in the identifiers of the units of your project.
Therefore, in your code, you should better "get closer" units that belong to the project, because they are more used, than from other auxiliary units.
The redefinition of classes is a practical method to minimize the collision of names between classes, even using short identifiers.
Introduction
The Object Pascal language has a very useful feature which, I believe, is not widely used by developers.
I do not know if there is a specific name for it, but I named it "redefining classes".
In fact this feature can be used to redeclarate classes, constants, and even functions.
However, in object-orientation, we basically only use classes. So, forget the rest and let's focus on them.
Let's take a look at some techniques that can be applied using such a concept.
Renaming
Imagine that you want to use a class of some Lib but, this class has the same name example TSmartMemory of one of your classes, which you already use throughout your code. What to do?
The first option is to never use both classes on the same unit. But maybe you're not that lucky.
The second option is to prefix one of the Classes with the unit name very common to see this in Java projects for example:
    uses
      LibMemory,
      MyMemory;

    begin
      M := TSmartMemory.New;  // your class
      L := LibMemory.TSmartMemory.Create;
    end
The third option, which I use most of the time, is "rename" the class of Lib to a nomenclature that does not collide with the nomenclature already used in my project. Let's take a look at an example:
    unit MyMemory;

    uses
      LibMemory;

    type
      // TSmartMemory from LibMemory
      TLibStartMemory = TSmartMemory;

      // my new class
      TSmartMemory = class
        // ...
      end;
In the example above, both classes are declared in the same unit in the project the MyMemory and the project can use both classes without nomenclature collision.
    begin
      M := TSmartMemory.New;
      L := TLibSmartMemory.Create;
    end;
Using this technique we avoid name conflict, which is very useful.
Instead of using the real class name, we can give it an alias. The code stay cleaner, simple and using short identifiers, because we don't need to use the unit name as a prefix.
The C# language has something very similar which makes me wonder where the main architect of the C# language took out this idea.
Visibility
Many times we need to use a composition of different classes to solve a problem.
But, if each one of these classes has been declared into a different unit, we will need to declare all those units to get access for each one of those classes.
For example. We need of TClass1, TClass2, and TClass3. Each one of them into different units, Unit1 , Unit2 e Unit3, respectively.
    unit MyUnit;

    uses
      Unit1, Unit2, Unit3;

    begin
      TClass3.New(
        TClass2.New(
          TClass1.New
        )
      )
    end;
If we need to use that composition in many places of the code, we will always have to remember which units these classes are in.
Another option is to make classes visible, redeclaring all of them in a single unit, for example Unit123, so that we can use them in a simpler way but still maintaining each implementation in different units.
    unit Unit123;

    uses
      Unit1, Unit2, Unit3;

    type
      TClass1 = Unit1.TClass1;
      TClass2 = Unit2.TClass2;
      TClass3 = Unit3.TClass3;
Now, just use Unit123 in the code to have access to all 3 classes that previously could only be accessed in different units.
    unit UnitTest;

    uses
      Unit123;

    begin
      TClass3.New(
        TClass2.New(
          TClass1.New
        )
      )
    end;
This technique is very useful for simplifying an API, giving developers only a few classes for use in very specific contexts.
Inheritance
There are times when we want to use class inheritance even though Object Composition is the best choice however, we would like to use the same name of the ancestral class.
Let's imagine that we are developing a software and, into one of its units, has a class that represents a PDF file. We name this class as TPDFFile.
However, we know there may be tens or hundreds of Libs already working with PDF. So, let's named one of them of PDFLib, for example.
In PDFLib we have a class called TPDFFile which is exactly the same name that we have already decided that will be used in our software, but the project architect says that our class should inherit from PDFLib.TPDFFile.
I guess you already know the answer:
    unit MyPDFUnit;

    uses
      PDFLib;

    type
      TPDFFile = class(PDFLib.TPDFFile)
        // more methods
      end;
By prefixing the class of Lib, we can identify it differently from our own class declared in the same unit.
The TPDFFile class is now an extension of PDFLib.TPDFFile which belongs to an external Lib. But, for all the rest of the code in the project, there will be only the MyPDFUnit.TPDFFile class to represent a PDF.
Extending
The technique that I will show you now was already used even before to have a syntax for class helpers.
For example, imagine that you want to include new properties or methods in TEdit class. The first thought is to use inheritance to create a new component. However, you do not want to replace each TEdit in all TForm that already exist in the project. So, what to do?
The answer is still to use inheritance. But there is a trick or hack that I will show in the technique below. But I would like to remind you that this should be used very sparingly. I only used this technique very seldom and only for classes that represent widgets, that is, classes of components that are used in Forms.
To extend a TEdit without creating a new class and without having to change the Forms, just use the same technique above:
    unit MyStdCtrls;

    type
      TEdit = class(StdCtrls.TEdit) // or Vcl.StdCtrls.TEdit
        // more methods and properties
      end;
You do not need to change widgets in Forms. The design rendering of the Form will work using the resources (* .lfm * .dfm) correctly.
There is one trick you can not forget: In each of these Forms you will need to declare your unit after of the actual StdCtrls unit.
    unit MyForm1;

    uses
      StdCtrls, MyStdCtrls;
This hack is required for the compiler to find the declaration of your unit before it is found in the default StdCtrls.
That is why it is so important to have an order in the declaration of the units.
Optional Nomenclature
This technique can be considered the opposite of the first one shown in this article, ie., instead of you "renaming" a class belonging to another Lib, you will give to the developer some naming options for the use of their classes.
Imagine that you've coded a package with some classes. In this package you like to use simple names such as TStream, TMemoryStream, TString, TInteger, etc.
See that we already have some possible "problems" here. Let's see:
1. The TStream and TMemoryStream classes already exist in FPC or Delphi and, because that, there may be a collision of names if developers use your package, as it is very likely that they are already using such default classes names in their projects;
2. The TString and TInteger classes are classes with very simple or generic names and, again, it is likely either some other Lib or even the projects of these developers already use such names.
The problem here is the name clean and short. While these names are perfect, they have the great potential of generating some name collision problems.
But when you are creating your package, you have to abstract the external world. The context of the package that should influence the nomenclature of classes and not the external world that might use it!
I "fought" against this problem for many years. Before I "discovered" this technique, I prefixed my Classes with 1, 2 or 3 letters this seems to be the standard used by all component developers in the market however, you can find out over time that your "prefix" chosen for your classes have already been used in another Lib from third parties.
Imagine you have to use verbose names like TXyzMemoryStream throughout your code to then find out that Xyz is already a prefix used by a large "component maker" on the market.
Then, I discovered that the Object Pascal language already had an answer and I could have the best of both worlds. I could use simple, compact and clean names inside my context (package, project, lib) but giving to potential developers a more verbose, but with less possibility of collision of names, if so desired.
Let's look at an example: Imagine that you have a package with a class named TDataStream. This name already avoids the collision with TStream which is basically what this class represents, but the Data prefix was not used to minimize the nomenclature collision, but rather because of its semantics.
But, let's say either Lazarus or Delphi have now implemented a general purpose class called... TDataStream.
Should I change the name of this class in all my projects that already use this nomenclature? Of course not!
I would only give the option for (new) developers to use another nomenclature for the same class, like this:
    type
      TDataStream = class sealed(TInterfacedObject, IDataStream)
      // some methods
      end;

      TSuperDataStream = TDataStream;
The code now has 2 naming possibilities for the same class!
You can either continue to use TDataStream throughout your code, as long as you hold the declaration order of the units, or you can use the new TSuperDataStream option.
And, even if there is still a collision of nomenclature, it will be up to the developer to use the first technique of this article to solve it.
This way, both sides (package developers and package users) are free to use whatever names they want in their classes.
The only exception, as far as I know, are the components that are installed in the IDE. Both IDEs (Lazarus and Delphi) do not allow install components with the same name, even if they are in different packages.
Conclusion
The redeclaration or renaming of classes (and constants, functions, etc) is a technique that exists almost from the beginning of the language, but which the vast majority of developers do not use, either due to lack of knowledge, inability or lack of interest.
It is an old concept but it provides some techniques and possibilities for better encoding today, as demonstrated in this article.
In object-orientation, an object can be considerable immutable even if it... changes.
Introduction
Learning a complex concept tends to be better absorbed if we divide the concept into small parts.
For example, when we begin to learn English, we are taught that to refer to something that happened in the past, we must use past verbs to make affirmations or use the modal verb did or did not to ask questions or denials. This is the verbal tense Past Simple.
Example: "I saw this movie".
Then, as you begin to study the language more, you discover that there are many other ways of expressing something that has occurred in the past. For example, the use of verb tense Present Perfect.
Example: "I have seen this movie".
Here we see the use of the modal verb to have and the use of Past Participle of the verb to see.
Both sentences say the same when we translate to Portuguese, for example, but the second sentence can be considered more correct than the first one you only discover this after you learn the Present Perfect.
But this is not an English article, so let's go back to object-orientation.
This introduction is to show you that we must first learn a concept in its simplest form; then we improved.
Concepts of Immutability
When you've learned about immutability you may have thought that an object is immutable if, after it is created, nothing is changed inside it or that the object always returns the same information when a method is called.
Well, that is not so simple.
Unlike functional languages, where everything is immutable by default, in object-orientation this concept may be broader.
Let's take a look in some concepts.
External content
A class that represents a file could be immutable in two ways:
type
  TFile = class
  private
    FFilePath: string;
    FStream: IDataStream;
  public
    constructor Create(const FilePath: string);
    function Stream: IDataStream;
  end;

  implementation

  constructor TFile.Create(const FilePath: string);
  begin
    FFilePath := FilePath;
  end;

  function TFile.Stream: IDataStream;
  begin
    if not Assigned(FStream) then
      FStream := TDataStream.New(FFileName);
    Result := FStream;
  end;
In the code above, the TFile.Stream: IDataStream method will always return the same value read on the first run.
The object is immutable and constant.
But, what if we change the method like below, the class will continue been immutable?
function TFile.Stream: IDataStream;
begin
  Result := TDataStream.New(FFileName);
end;
Yes, for sure.
Although the result of the method may be different for each call the contents of the file can be changed by another process the object would remain unchanged because its state (FFilePath attribute) has not been changed.
It is immutable, but not constant.
The same concept applies to content coming from a Database, Website, etc.
Content in Memory
Can a list of objects be considered mutable if we add items after it is created?
Let's take a look in this code:
type
TDataParams = class(TInterfacedObject, IDataParams)
  private
    FList: TInterfaceList;
  public
    constructor Create;
    class function New: IDataParams; overload;
    destructor Destroy; override;
    function Add(Param: IDataParam): IDataParams; overload;
    // ...
  end;

implementation

{ TDataParams }

constructor TDataParams.Create;
begin
  inherited Create;
  FList := TInterfaceList.Create;
end;

class function TDataParams.New: IDataParams;
begin
  Result := Create;
end;

destructor TDataParams.Destroy;
begin
  FList.Free;
  inherited;
end;

function TDataParams.Add(Param: IDataParam): IDataParams;
begin
  Result := Self;
  FList.Add(Param);
end;
The TDataParams class encapsulates a list of TInterfaceList.
At each inclusion of a new item, the in-memory persistence of the objects is delegated to this internal list.
Do you think we're changing the object state (FList)?
We are not.
The reason is that we are not redefining FList. We are not creating a new list.
A list of items is being created in memory memory blocks but the initial address of FList remains intact.
Also, FList is a secondary attribute, so we could even redefine this attribute without being in disagreement with the principle. But, if the list instance were passed in the constructor, then we could not redefine the object because it would be considered as a primary attribute.
Immutability of the State
If even after some internal or external changes to the object, it is still considered immutable, how do we know if we are not violating the principle of immutability?
Simple: If the state of the object, ie., its primary attributes, is not changed/redefined, then it is immutable.
Once an attribute is instantiated, it can not have its memory address changed. These attributes will be initialized in the constructor of the class and can never be reinitialized.
Your object must be faithful to arguments passed in the class constructor, however it is free to work and respond to whatever you want in your methods.
Conclusion
Immutability, in object-orientation, is not about internal or external changes to the object, but about not changing the primary state of it.
We're excited to inform we are organizing a new training day: TMS RADical Web Day in Germany.
Learn everything about fascinating new ways to create modern new web development with Delphi!
When you're a passionate Delphi developer and interested in applying your skills for creating web applications, you cannot miss the TMS RADical Web Day.
On the TMS RADical Web day, you can:
Discover how to apply your Delphi knowledge to create high performance web applications.
Learn how RAD techniques can be applied to go web with components.
Learn how you can integrate existing web frameworks like jQuery.
Experience how to use REST services from your web applications.
Learn how TMS XData or Embarcadero RAD server data can be used from web apps.
Learn how you can now use FNC UI controls not only for VCL, FMX, LCL apps but also for the web.
Mingle with fellow Delphi developers.
Get a glimpse of the roadmap of future developments under the TMS RADical Web umbrella.
Talk in person to the experts from TMS software.
Receive a gift with the fully functional trial version of TMS WEB Core, samples and documentation.
Get 20% discount for one product of your choice, for your new licenses!
Organization
Sessions are presented by:
Bruno Fierens, CTO of tmssoftware.com + Embarcadero MVP
Roman Kassebaum, architect tmssoftware.com + Embarcadero MVP
Wagner Landgraf, architect tmssoftware.com + product manager TMS Business Subscription
Adrian Gallero, architect tmssoftware.com + product manager TMS Flexcel product line
Leon Kassebaum, Delphi & TMS WEB Core enthusiast
Location
This extraordinary event will take place at Hotel-Residence Klosterpforte, Klosterhof 2-3, 33428 Harsewinkel-Marienfeld, GERMANY. The location is easily accessible via the A2 motorway.
TMS software has chosen for Hotel-Residence Klosterpforte as it offers an inspiring and peaceful place in the midst of the nature and green to maximize your concentration & creativity. Facilities for hotel rooms at the event are optionally available for attendees.
Registrations
Early bird: 195 EUR (before May 1, 2018)
Regular price: 245 EUR
The registration fee includes a full day access to the sessions and coffee/drinks during this day. A 3 course hot meal is served for lunch.
Seats are limited. Don't delay your registration and reserve your seat!
Get more information or make your reservation here!
One of the most important aspects of a REST API server is security. It should be mandatory that your data is encrypted while being transferred between client and server. And the standard way to do such encryption is using HTTP Secure (HTTPS).
To support HTTPS in your server, you need an SSL/TLS certificate. Not so long ago, this was a task that was relatively annoying/hard to do, and it would also require you to pay yearly fees for that. Thats not true anymore, since the release of Lets Encrypt. From their website: Lets Encrypt is a free, automated and open Certificate Authority. What does that means, basically? You can now have SSL/TLS certificates for free. And automatically!
To install a Lets Encrypt certificate in your TMS Sparkle server, we are going to use a tool named win-acme (Simple ACME Client for Windows, WACS - Windos ACME Simple). It was formerly called letsencrypt-win-simple (LEWS). The video presented at the end of this article was made when the tool still had its old name, so also some screenshots of this article will reflect that as well. But the process remains mostly the same with very small differences mentioned in this article.
In this example we are going to secure a server that responds to address http://app.devgems.com. To start with, you must have a domain name and your server must be working and responding HTTP requests to that domain name. Here is for example a screenshot of a browser request to that server. Note that its not secure yet
Upload the downloaded file to the Windows server running your TMS Sparkle server, and extract it to any directory, for example C:\letsencrypt. You should have a folder with the files like the following:
Notice the selected file above, named letsencrypt.exe.config. Its the config file for the tool. In most recent versions, that file would be named settings_default.config. Whatever is the name you have there depending on your version, open that file in a text editor (Notepad, for example) and search for a setting named CertificateStore. Change the value of that setting to My. The section of the file should look like this:
The GUID in appid above could be anything. You can change to a GUID value you want, or just use what's there. You should then have your new file in the folder:
Now open command-line with administrator rights, go to C:\letsencrypt folder if you are not already there, and run the following command. Please don't forget to replace <yourdomain> by your real domain. In the case of our example here, it would be app.devgems.com
Depending on the version of the tool you are using, you might be asked to enter your e-mail address and agree to the terms of condition. The e-mail address will only be used by Let's Encrypt to notify you about certificate expirations. You will only have to do that for the first time.
If everything went ok, you should have an output like this indicating the certificate was generated and installed in your computer:
You can open the MMC Snap-in to check that your certificate is installed properly:
And that's it! Not only the certificate is now installed in your server computer, but it is also configured to your TMS Sparkle server and will be renewed automatically. Your server now supports HTTPS forever! If we browse to our server address now using HTTPS, we can confirm it's using the new certificate:
The following video shows in much more details the operation described above, including using the "test" flag to test the whole process in a test environment before using the production one.
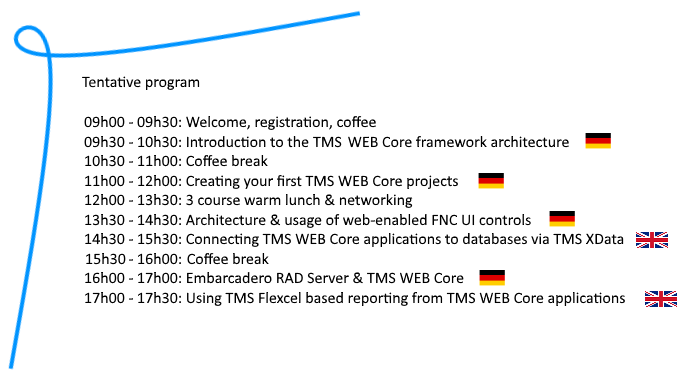
Here is an overview of what is waiting for you on the first TMS RADical Web Day on May 24th in Germany! You will experience first-hand from the experts of TMS software all details, inner-workings, examples, architecture, roadmap, binding to server, etc... for exciting new ways to create modern web applications for Delphi developers.
Our TMS XData expert Wagner R. Landgraf travels from Brasil to Germany especially for the TMS RADical Web training day on May 24th at Marienfeld, Germany. TMS XData is the tool for Delphi developers to enable creating fast, easy and secure REST APIs to access cloud databases from desktop, mobile and web client applications. As there is a demand for in-depth training on this powerful TMS XData product, we decided to also offer a possibility for training on TMS XData on May 25th, the day after the TMS RADical Web training day and available for an ultra limited number of developers to ensure a personal, hands-on and very interactive training.
TMS XData Training Day (all sessions in English)
09h00 - 09h30
Welcome, coffee, meeting
09h30 - 10h30
1. Introduction to TMS Sparkle and TMS XData
a) Presenting TMS Sparkle concepts: http.sys, modules, example server
b) Creating a XData module with a hello world operation
c) XData overal concepts: service operations and entities
10h30 - 11h00
Coffee break / Instructor available for questions and discussion
11h00 - 12h00
2. Service Operations
a) Creating service operations - interface and implementation
b) Parameter passing: in body, in url
c) Supported parameter types: scalar, structured and PODO
d) Parameter by reference
e) Memory Management
f) Using/receiving TStream
12h00 - 13h30
3-course warm lunch / instructor available for questions and discussion 13h30 - 15h00
3. Database access
a) Traditional approach
b) Connection Pool
c) Aurelius integration in service operations
d) Entity publishing: CRUD operations
e) Querying, paging and counting entities
f) Entity set permissions
15h00 - 15h30
Coffee break / Instructor available for questions and discussion
15h30 - 16h15
4. Desktop client-side development
a) TXDataClient overview
b) Invoking service operations
c) CRUD operations from client
d) Memory management
16h15 - 17h00
5. Web client-side development
a) TXDataWebClient overview
b) TXDataWebDataset usage
c) Asynchronous paradigm
17h00 - 17h30
Closing, questions and answers.
Alternative advanced topics that can be handled on-demand:
a) JWT and authentication
b) Server-side events
c) Custom error-handling in server
d) Swagger/OpenAPI
The TMS XData training day price is 295EUR. For Delphi developers attending both the TMS RADical WEB training day and TMS XData training day, price is 395EUR.
Contact us directly by email sales@tmssoftware.com for registrations. Contact us as quickly as possible as registration is on a first-come, first-serve basis.
TMS Analytics & Physics developing library includes many extensions for various mathematical applications: complex numbers, linear algebra, special functions, common fractions, numerical methods. New version 2.4 introduces package for statistical analysis. The extension allows evaluating base statistical properties of real data samples (mean value, median and others), generating sequences of special numbers (Fibonacci, prime numbers and many others), creating arithmetic, geometric and harmonic progressions, working with probability distributions.
It should be noted here, that as the Analytics library allows symbolic evaluations of very complicated formulae, some statistical problems can be solved without using the special package. For an example, the Linear Algebra package includes functionality for processing array and matrix data. So, we can solve, for an example, the following problem: find the sum of A array elements those are greater than x. The result can be calculated with the following code:
The output for the code is the following:
The problem is solved with the if function that compares all items of the A array with x value and generates new array which contains elements of A if the condition satisfied and 0 value if not. When the sum of the result array calculated we get the solution of stated problem.
The goals of new Statistics package is providing the simplest formula for evaluating base statistical characteristics and solving statistical problems that cannot be solved without specialized library.
First, let us consider evaluation of base statistical characteristics of some discrete sample values, stored in A array. This can be done with the following code:
For this data, we get the following statistical values:
Mean of A = 0.155625
Median of A = 0.135
Mode of A = 0.1
Variance of A = 0.012124609375
Deviation of A = 0.440447215906742
As can be seen from the code above, every value calculated with one function call. The function Mean{P}(A) here evaluates the mean value of the data. This function is parametric and the P parameter specifies the power of the mean (https://en.wikipedia.org/wiki/Mean#Power_mean). The parameter value can be one of the four: -1 harmonic mean, 0 geometric mean, 1 arithmetic mean, 2 quadratic mean. In our case P=1 and we calculated the arithmetic mean of A.
One of the advantages of using the symbolic capabilities of the Analytics library is that, even if some feature is not realized in the package directly, one can use the formula for this feature. Let us consider how to do this for other types of mean values. There is so called generalized mean (https://en.wikipedia.org/wiki/Mean#Generalized_means) that is defined by the formula:
where f is a function and f-1 is its inverse. For an example, if f is exponent, then f-1 is natural logarithm. The exponential mean function is not provided with the statistical package, but it can be easily evaluated with the following simple formula:
which produces the output:
Exponent Mean of A = 0.161840327746035
The value of exponent mean is slightly differs from common arithmetic mean that follows from the different meaning of the characteristics.
One of main features of Statistics package is that it allows working with probability distributions and solve real statistical problems (https://en.wikipedia.org/wiki/Probability_density_function). The version supports 6 distributions: Gauss (normal), Laplace, Cauchy, Gumbel, logistic and exponential. Let us consider the following statistical problem: there is a known probability distribution for lifetime of a bacteria species. Let us suppose the distribution is Gaussian function with parameters µ and s (https://en.wikipedia.org/wiki/Normal_distribution). We need to calculate the probability that the bacteria dies on the time interval [t1..t2].
This probability defined by the formula:
where f(x) is the probability density function (PDF) of the distribution. The value of the probability can be evaluated with the following code:
First, we added the variables for the distributions parameters to the translator and variables for the time interval. The function 'GaussPDF{µ s}(t1 t2 100)' produced the array of 100 values for the Gaussian PDF with specified parameters (µ=5 hours, s=0.5 hours) on the specified interval of [5.5..6.0] hours. Then we used numerical integration of the values, replacing the integral with the appropriate summation. The answer for our question is - the probability that the bacteria dies on the interval 5.5-6 hours is about 13.6%.
The version 2.4 is already available. Source code of the example application for statistics analysis can be downloaded from here.
TMS WEB Core promises easy, fast and RAD component based web application development. For fast, real-time updates on a web page with light-weight server-communications, WebSockets are an ideal mechanism.
That is why TMS WEB Core also comes with a WebSocket client:
This is a non-visual component that makes it very easy to start using WebSocket based communication. Drop this component on the form, configure the WebSocket hostname & port and call WebSocketClient.Connect. When a connection is established, the OnConnect event is triggered. From the moment of connection, data sent by the WebSocket server is received via the event OnDataReceived. The signature of this event is:
Origin is the WebSocket server sending the data and the data itself is sent as a JavaScript Object. This means it can be different types. Sending data is equally easy. Simply call
WebSocketClient1.Send(AMessage: String);
To create an online chat application using this WebSocket technology takes only a few configurations in the component to configure the WebSocket server and a couple of lines of code. There is the logic that performs the Connect & Disconnect:
procedure TWebForm1.Connect;
begin
  if FConnected then
  begin
    WebSocketClient1.Disconnect;
  end
  else
  begin
    if WebEdit1.Text = '' then
      ShowMessage('Please enter a name first')
    else
      WebSocketClient1.Connect;
  end;
end;
To send a message when connected, we simply send the message as color/sender/message pair via the WebSocketClient.Send() function. Each chat user can choose a color and messages from the user are displayed in his selected color:
procedure TWebForm1.SendMessage;
var
  s: string;
begin
  if FConnected and (WebEdit2.Text <> '') then
  begin
    s := TMSFNCColorPicker1.SelectedColor) + '~' + WebEdit1.Text + '~' + WebEdit2.Text;
    // limit message length
    s := Copy(s,1,256);
    WebSocketClient1.Send(TTMSFNCGraphics.ColorToHTML(s);
    WebEdit2.Text := '';
  end;
end;
To display the message, we use the web-enabled TTMSFNCListBox component from the TMS FNC UI Pack. With this control we can show the received messages in listbox items with banding and some HTML formatting per item to indicate the sender and the message. The message is received via WebSocketClient.OnDataReceived as text and therefore we can use Data.toString to get the JavaScript object as text:
procedure TWebForm1.WebSocketClient1DataReceived(Sender: TObject; Origin: string;
  Data: TJSObject);
var
  it: TTMSFNCListBoxItem;
  sl: TStringList;
  s: String;
  n: string;
  c: TTMSFNCGraphicsColor;
  v: string;
begin
  it := lst.Items.Add;
  s := Data.toString;
  sl := TStringList.Create;
  try
    TTMSFNCUtils.Split('~', s, sl);
    if sl.Count > 2 then
    begin
      c := TTMSFNCGraphics.HTMLToColor(sl[0]);
      n := ''+sl[1]+'';
      v := sl[2];
      it.Text := n + ' says:
  ' + v;
      it.TextColor := c;
    end;
  finally
    sl.Free;
  end;
end;
There isn't much more to creating a chat application for your TMS WEB Core applications except of course to put a WebSocket server application on your server that can equally be written with Delphi. With TMS WEB Core we include a sample WebSocket server service application.
Thanks to TMS WEB Core, you can directly see the result of our demo in your favorite web browser, no need to install anything to explore! Head over to http://www.tmssoftware.biz/tmsweb/demos/tmsweb_chatclient/ to start chatting.
TMS WEB Core chat client application running in the Chrome browser
TMS WEB Core chat client application running in the Safari browser on iPhone
Get started today: Technical previews of TMS WEB Core, TMS FNC UI web-enabled controls, web-enabled TMS XData, the first parts under the TMS RADical WEB umbrella are exclusively available now for all active TMS-ALL-ACCESS customers.
Without a doubt, this was THE day our team looked forward to as well as many Delphi developers. The TMS RADical Web day was all about devoting a full day to the new web development tools being worked on by the tmssoftware team. We had chosen a place for this event in a peaceful green area of Germany, Klosterpforte, Germany. It would allow us to exchange the latest informations without any distractions from hectic & stressfull city life, away from busy & stressfull days company life typically brings.
With a group of about 40 persons, we not only presented the latest status of the developments of the TMS WEB Core framework, the web-enabled TMS FNC framework, TMS XData REST server technology, Flexcel reporting technology, Embarcadero RAD server technology, but we also listened closely to your needs, suggestions, concerns and questions. In short, we hope not only the attendees learned a lot, our team also learned a lot. In short, it was a very fruitful day. After the TMS RADical Web day, there was an even more in-depth day focused on TMS XData REST server technology. A group of about 10 Delphi developers intensively learned & discussed the many possibilities TMS XData REST server offers.
I especially want to thank for all the hard work delivered from the team present: Wagner Landgraf, Adrian Gallero, Pieter Scheldeman, Roman Kassebaum, Leon Kassebaum, Detlef Overbeek, Mattias Gärtner, Matthias Eissing.
If you missed this event, don't worry. Next, there will be a presentation about TMS Web Core at the Italian Delphi Day on June 7 in Piacenza and there is a meetup planned on June 12 in the offices of TMS software.
If you are hosting other events where you'd wish to see TMS WEB Core in action, please contact us and when feasible we'll consider coming to a place near you!
Meanwhile, the team is hammering out as much as possible the last niggles & issues and working feverishly to bring the first release as soon as possible.
Get started today: Technical previews of TMS WEB Core, TMS FNC UI web-enabled controls, web-enabled TMS XData, the first parts under the TMS RADical WEB umbrella are exclusively available now for all active TMS-ALL-ACCESS customers.
TMS WEB Core is a framework for creating web client applications from the Delphi IDE in the Delphi language and using RAD component based development. TMS WEB Core is designed to be totally open in many ways, also with respect to binding to a server back-end. This binding to the server back-end is typically done using REST APIs. TMS software has its own high-performance, flexible and low-cost REST API framework TMS XData for accessing databases on a server but it is equally possible to use node.js, ASP.NET Core microservices, other technologies or also the Embarcadero RAD Server that comes with Delphi (there is now one free license included in the Delphi Enterprise or Architect editions) and that offers a powerful, fast & flexible creation of REST API endpoint servers.
Embarcadero MVP, famous speaker and writer of several Delphi books Bob Swart, was excited when he learned about TMS WEB Core and wanted to explore the capabilities of using Embarcadero RAD server as a backend for a TMS WEB Core web client application. Based on the results of his research and work, Bob Swart did the effort to create an article that explains and demonstrates how one can use Embarcadero RAD server with TMS WEB Core from start to finish. There is not only the article that Bob Swart makes available but also the sample source code.
Downloads
Article:
Source code:
Get started today: Technical previews of TMS WEB Core, TMS FNC UI web-enabled controls, web-enabled TMS XData, the first parts under the TMS RADical WEB umbrella are exclusively available now for all active TMS-ALL-ACCESS customers.
They say time flies when you are having fun... It is hard to believe it has been about 2 years since my last blog post, which was also about a TMS Day. I see two options here: Either we start doing more TMS Days so I can blog about the sessions, or I just start actually writing down more stuff.
On my discharge I'd like to say that I haven't been completely silent this 2 years: I've been writing the stuff I would normally write in a blog post in the "Tips and Tricks" on FlexCel docs. Ok, this is a poor excuse, but an excuse anyway and I have nothing better so I'll stand by it.
Now, it is time to go back to the TMS Day. As always, it was a great experience to be there and speak face to face with customers and sharing experiences . Me sitting here and writing a blog post just isn't the same. And to be brutally honest, speaking with the people did change my mind, and this is not just something I am saying because it sounds nice. When I arrived to the TMS Day I saw WEB Core as an interesting technology, but I saw little connection with it and the FlexCel reporting stuff, which is what I do. Reporting is normally a server-side thing, to be done on the server where the database is, and not something you would do normally client-side in javascript. So, there is little to integrate: you can call FlexCel from WEB Core, but you can call any other reporting solution too. You can also use WEB Core with FlexCel, but you can use any other web solution with FlexCel too. When I arrived, this use case (WEB Core in the client, reports with FlexCel in the server) was the only one I had in mind. When I was there, I spoke with a lot of people and learned about a lot of new use cases I hadn't even thought about. When I left, I had a lot of more plans for a deeper integration. But more on that below.
FlexCel as a server side solution for reporting
We started the session with a very basic description of what FlexCel does. As usual, this was a very packed session and I had only half an hour, so I didn't wanted to waste a lot of time explaining what FlexCel did. We just covered the basics: With FlexCel you create Excel files either with code or by writing tags in an Excel template, and then you can export those files to pdf or html. While we use Excel as a building block for the report, it is not needed to have the result in Excel. And as this session was all about the web, we just created pdf and html reports.
1. A simple report
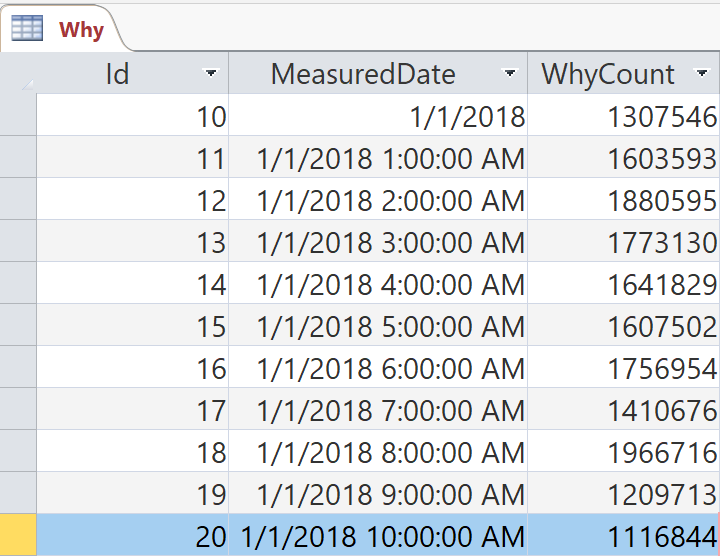
Some time ago I read about a really interesting project on where they used a raspberry pi to record how many times a day a baby would say the word "why". Being a father of a little 4 year old myself, I was very interested in the experiment and I thought it could be an interesting real world example on something that needed reporting. At the same time, with me also being lazy and with more stuff to do than I could possibly finish in five lives, I decided that instead of actually recording my child, I would just create a small database with my own estimates on how many times she would pronounce the word.
I ended up with an access database that looked like this:
Yes, it was in Access, and you wouldn't use Access for a real application. Bit for a demo, it is fine to me. Just remember to use a real database in real applications.
The next step was creating two different applications. Since TMS WebCore runs on the client (javascript) and FlexCel is a server side product which runs in the server (delphi), I needed to create both a TMS webcore app for the client, and a Delphi WebBroker app for the server.
1.1. Server side
Server side we created a new WebBroker app by going to File->New->Other... then choosing "WebBroker" in the left panel and "Web Server Application" in the right.
The focus on this session wasn't in how to create a FlexCel report or a WebBroker app, so I just used a pre-made example which you can download at the end of this post.
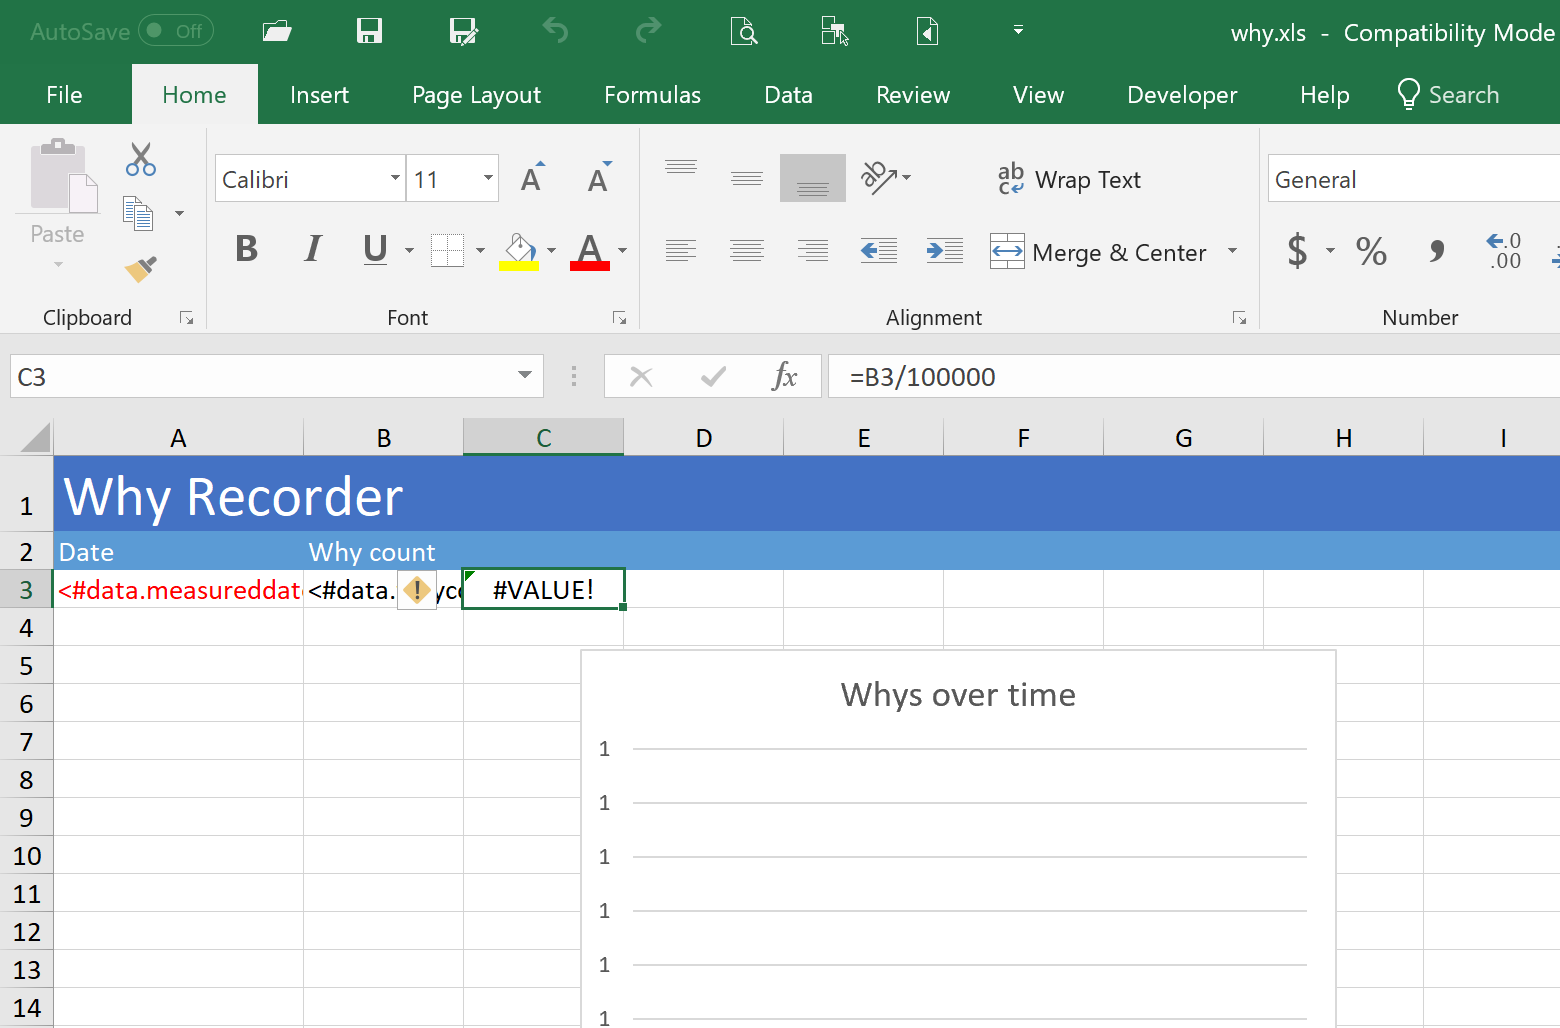
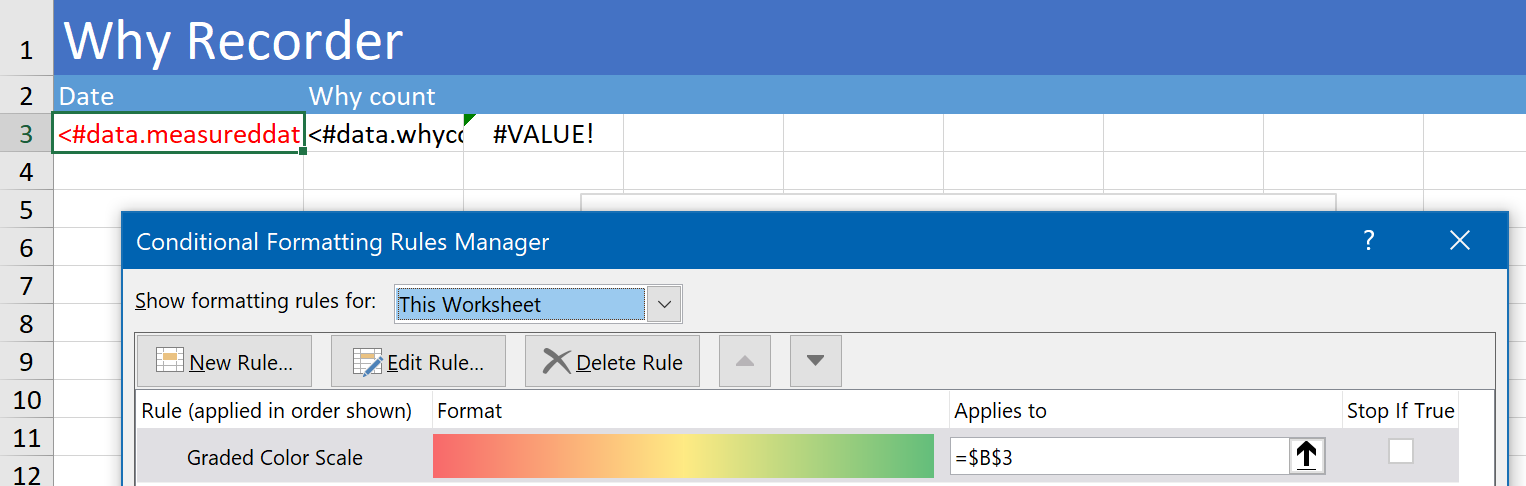
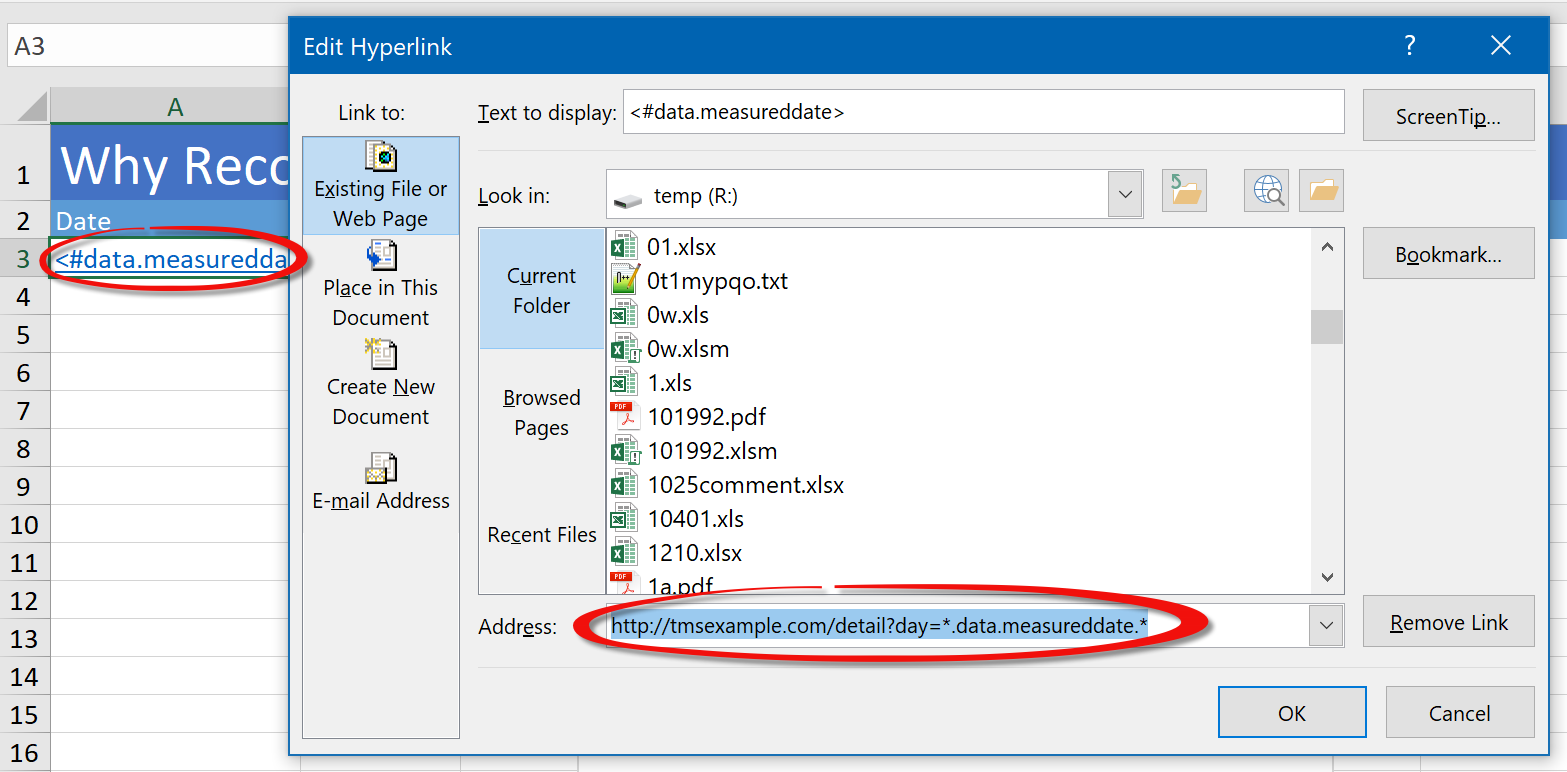
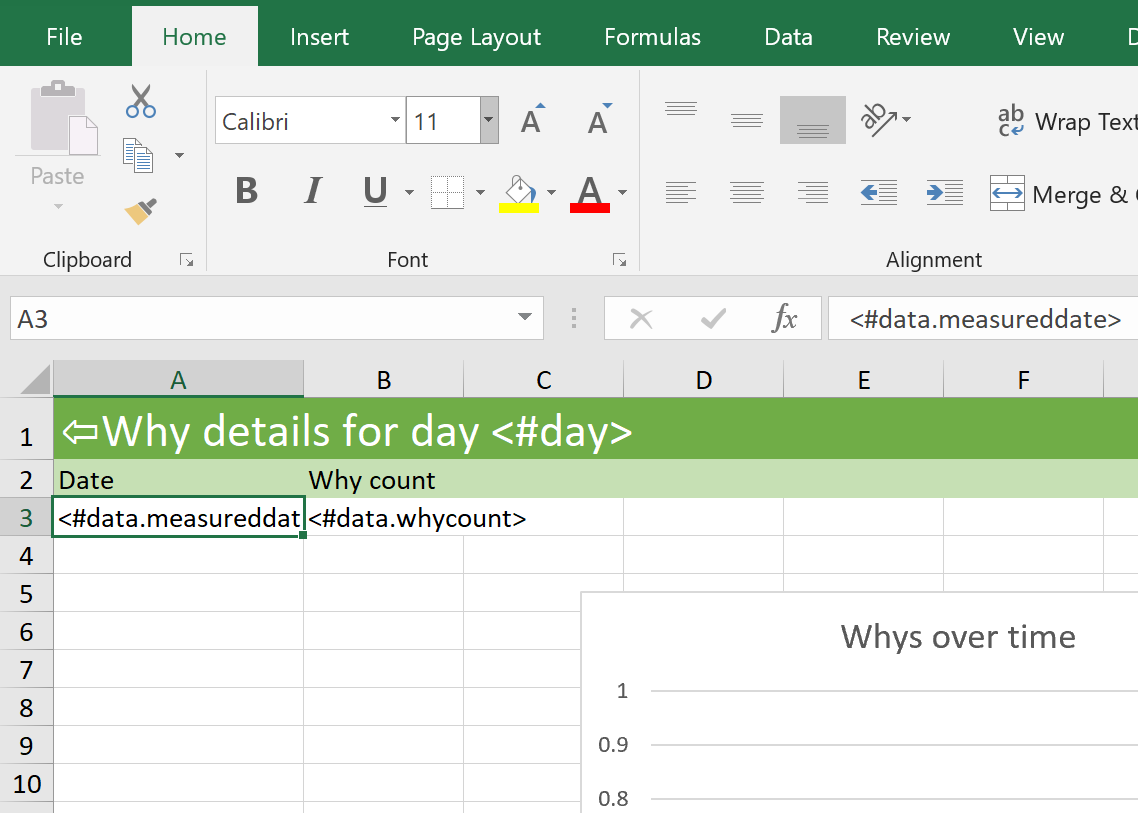
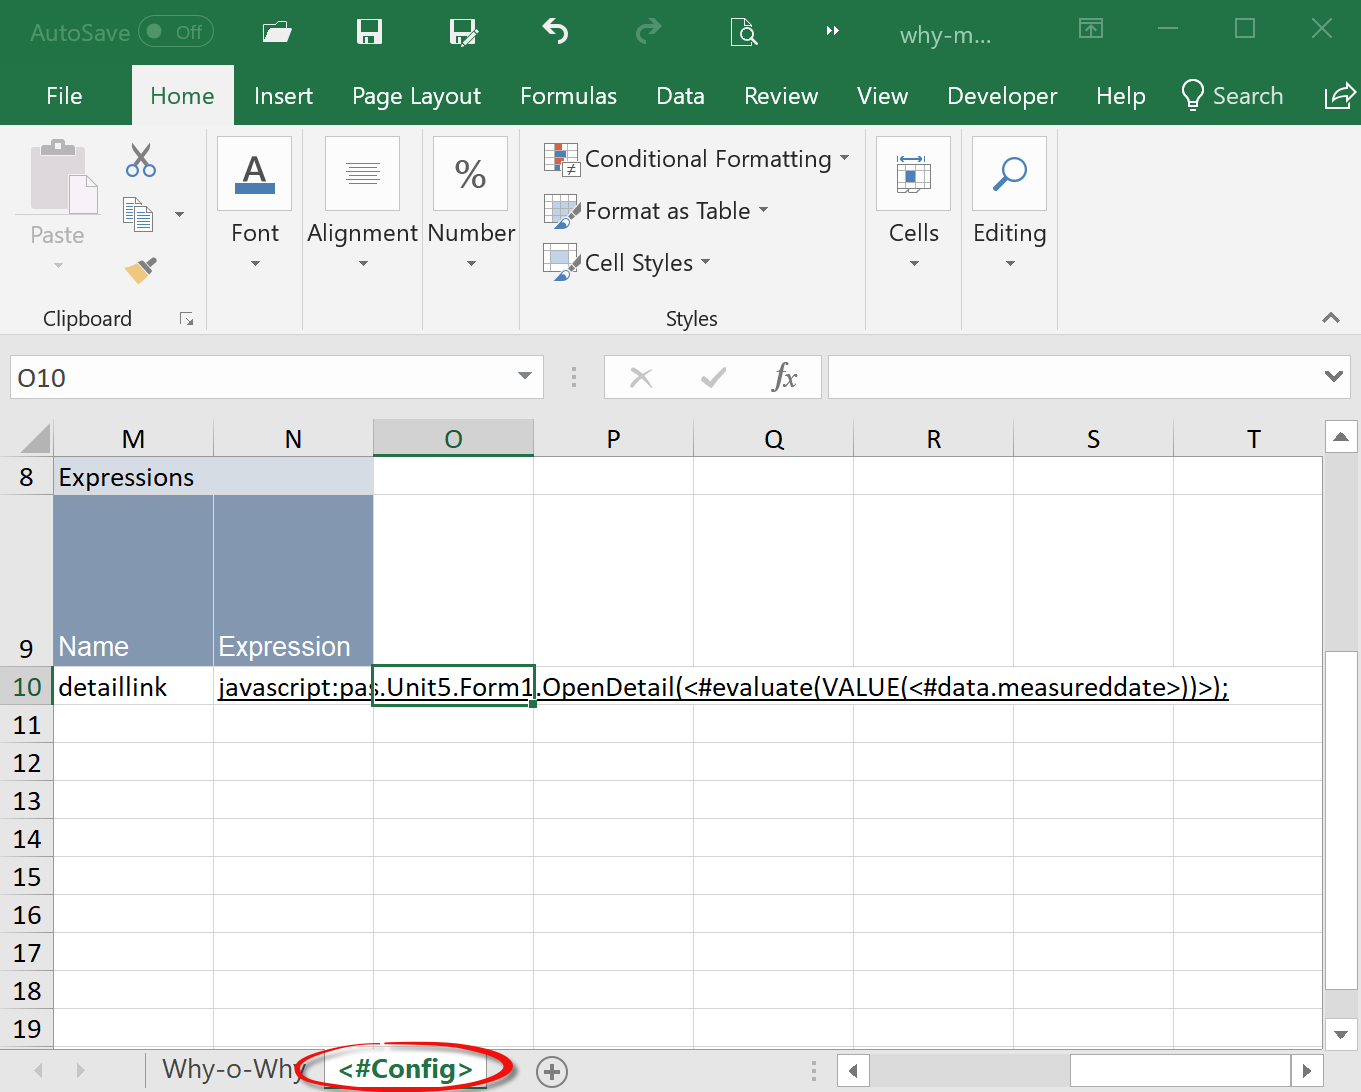
For the Excel report I just created an Excel file that looked like this:
I just wrote tags with the database fields (like <#data.measureddate>) in cells A3 and B3, then defined a name where the report would run and added a chart as to make it a little more interesting. Note: Right now FlexCel renders only charts in xls files to pdf and html, and while we are working in fully supporting xlsx this is not yet ready. So this is why I used an xls file instead of an xlsx.
I also added some conditional formatting just for fun:
After all, one of the nicest parts of doing reports in FlexCel is that you get access to all those simple features in Excel like conditional formats, tables or charts, so why not to use them? Even if in a case like this, I am not generating Excel files at all, only pdfs and html files.
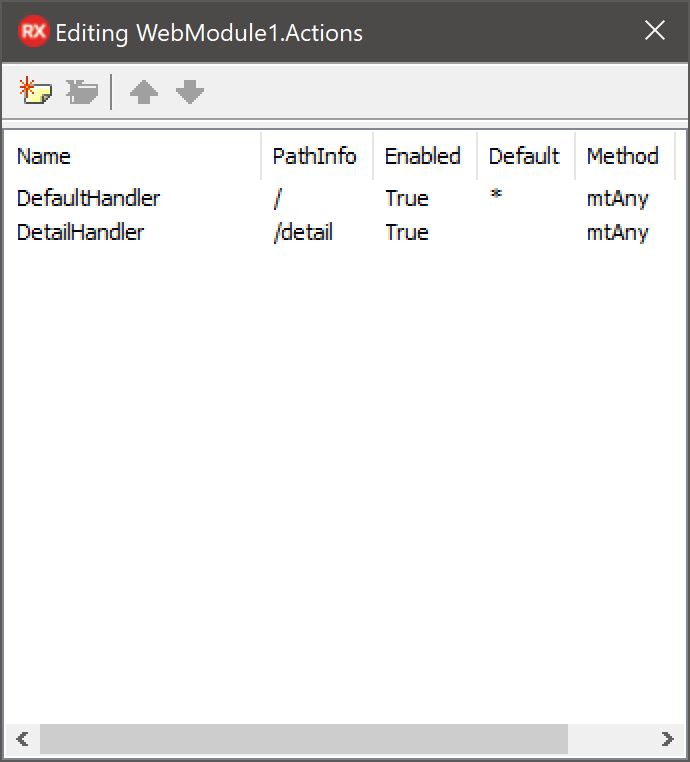
That was all I did in the template. Then in the Webbroker app, I added a datamodule to access the database, and the following code to the DefaultHandlerAction event:
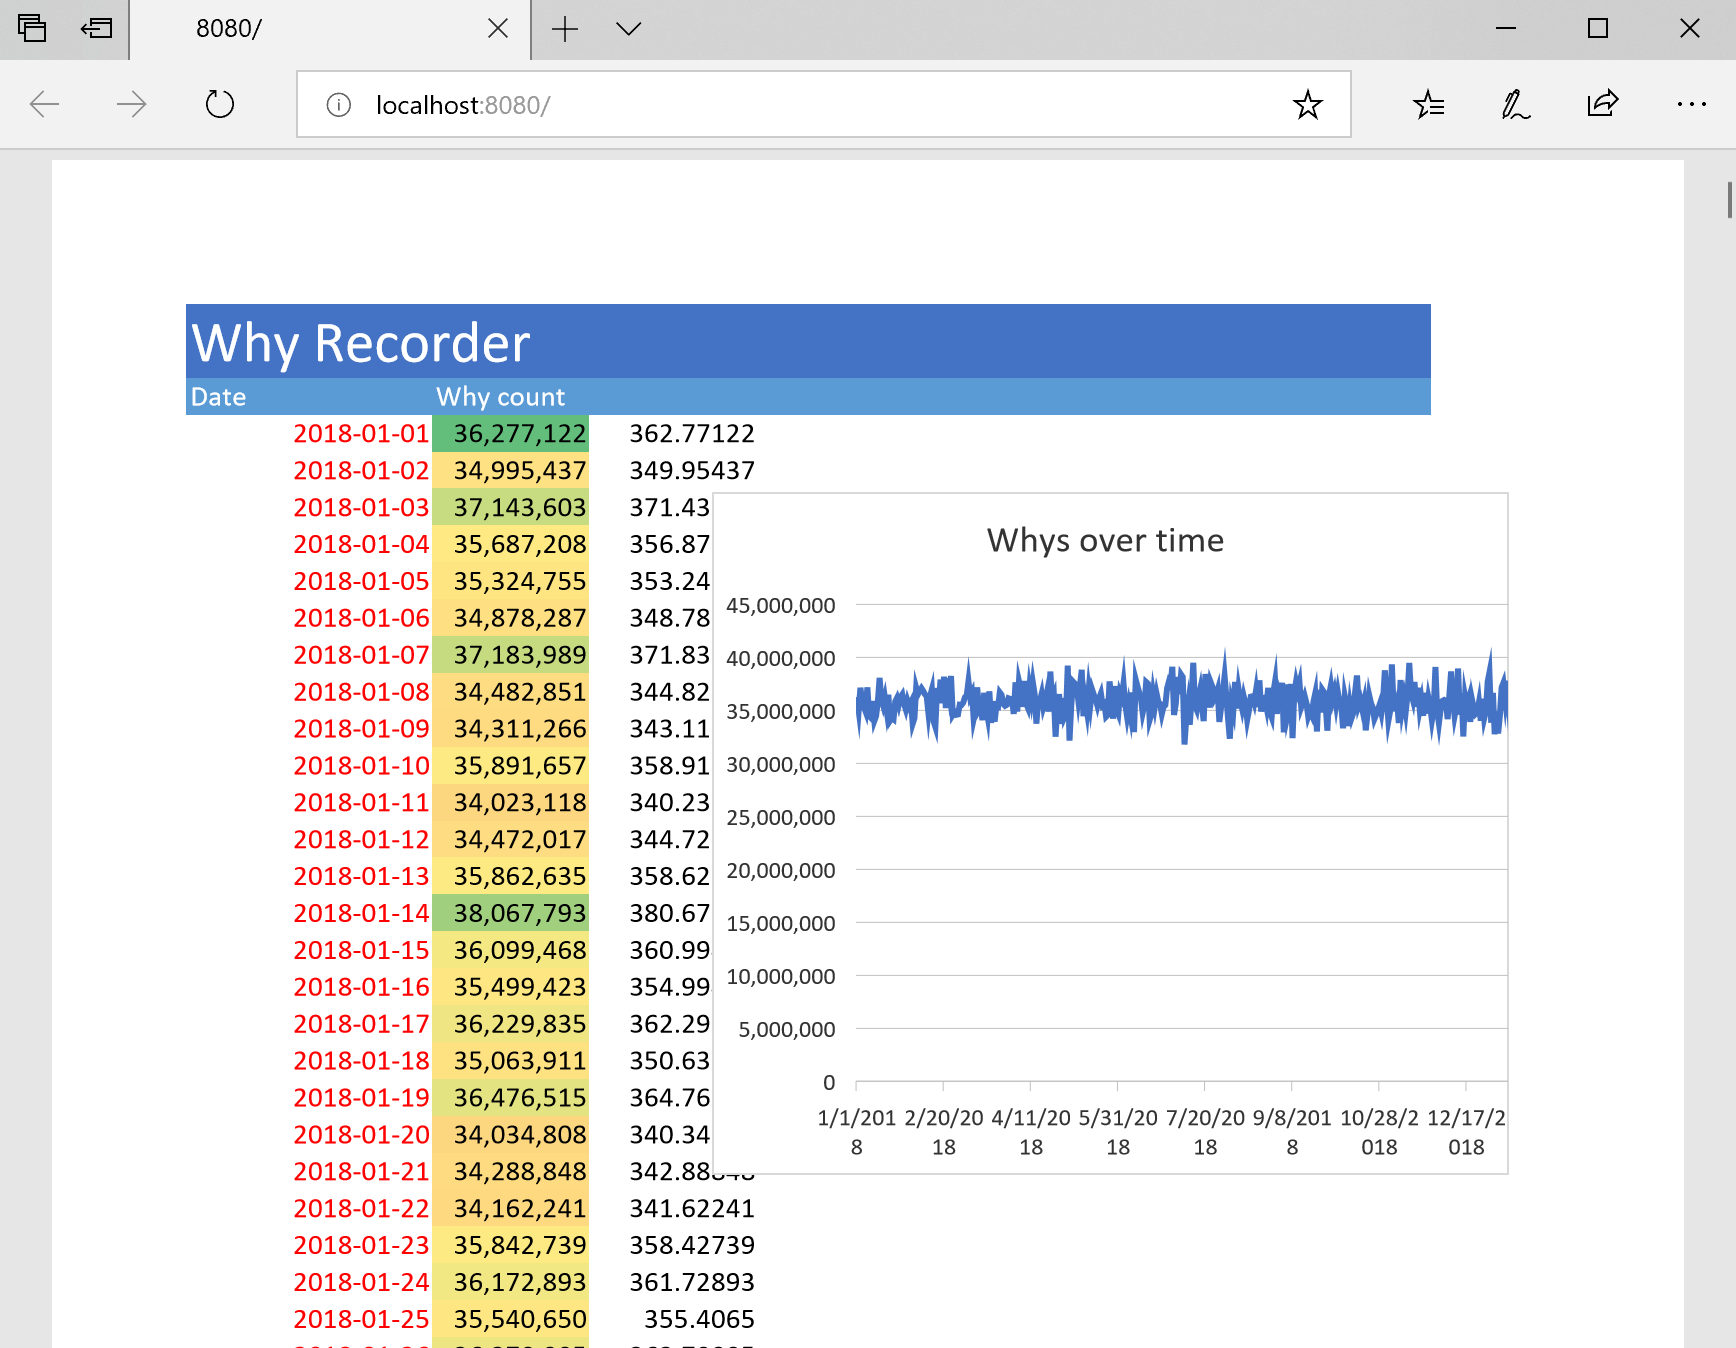
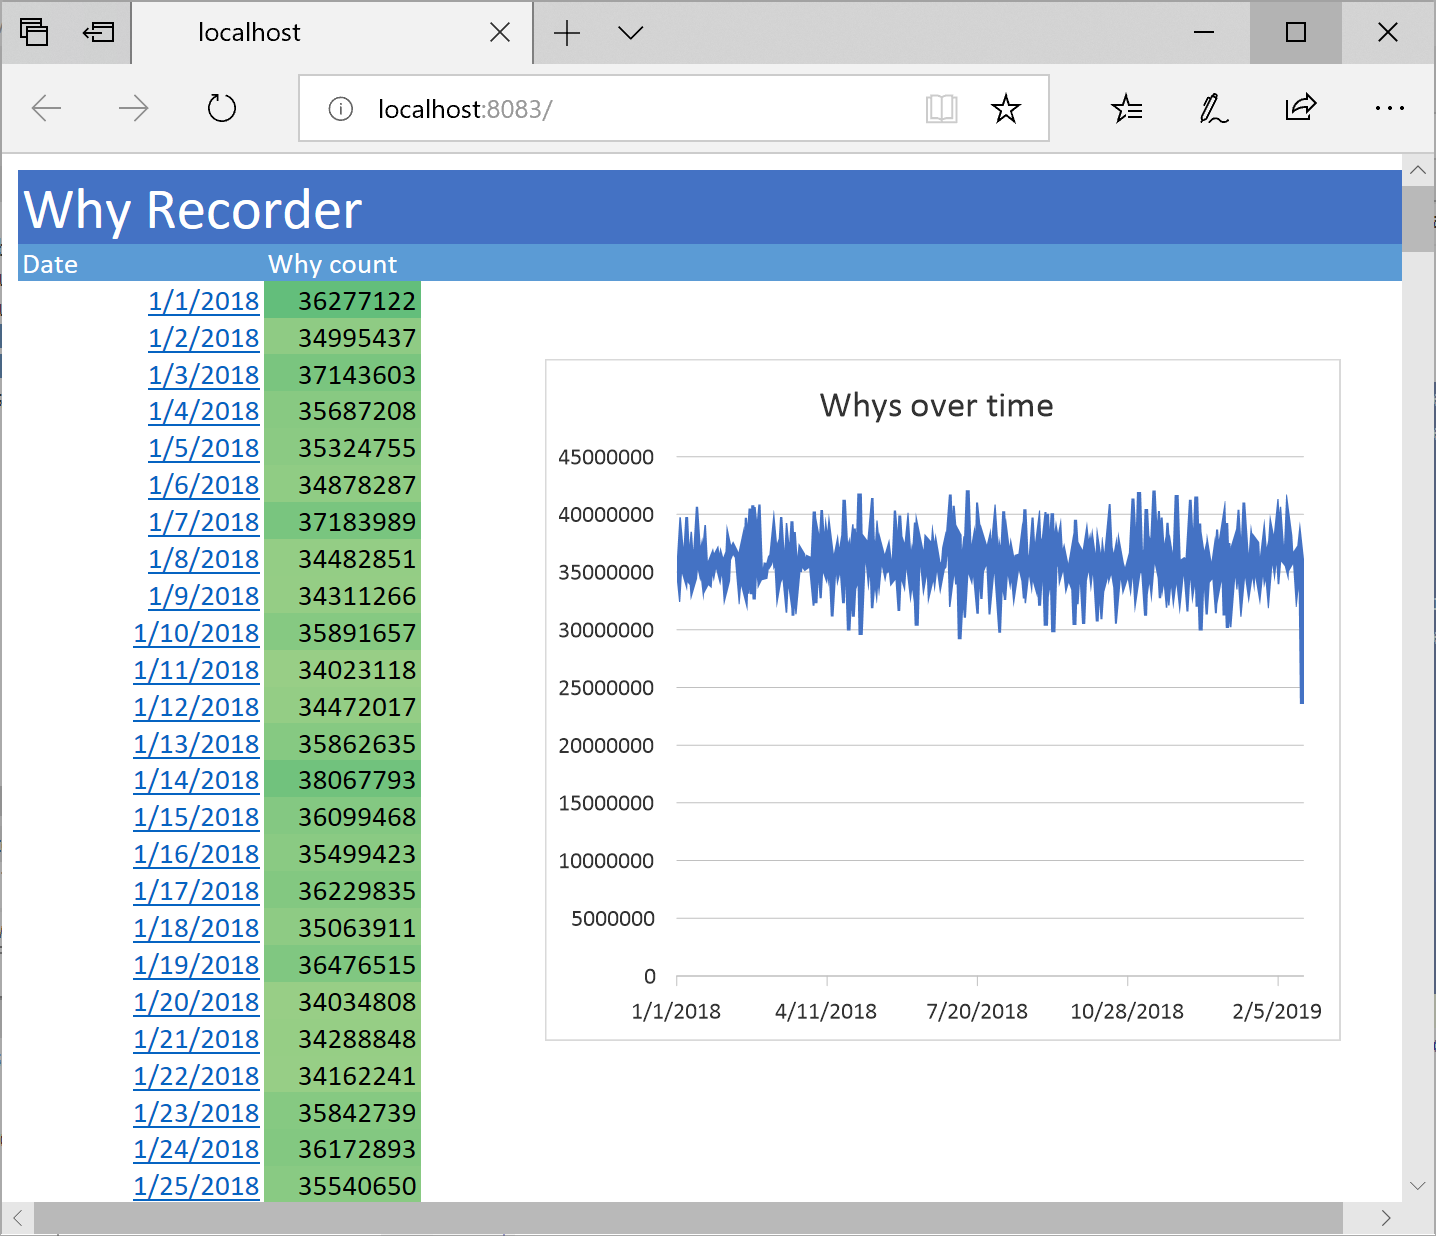
This basically adds the datasource "datamodule1.data" to the report, then runs the report and then exports it to pdf, sending the pdf bytes to the Response of the html app. If you now run the application, and press the "Open Browser" app in the Webbroker form, you should see something like this:
Note that until here, we haven't used TMS WebCore at all. This is just a server side app which runs a report over a database, and returns a pdf when you call it. Note also how we got the conditional formatting we wrote in the template for column B shows in the final report, and the chart is filled with data.
1.2. Client Side
Ok, now what about the client side? Imagine we have a TMS WebCore app, and we want to show the report when an user clicks a button on it. How do we call the server app we coded just moments ago?
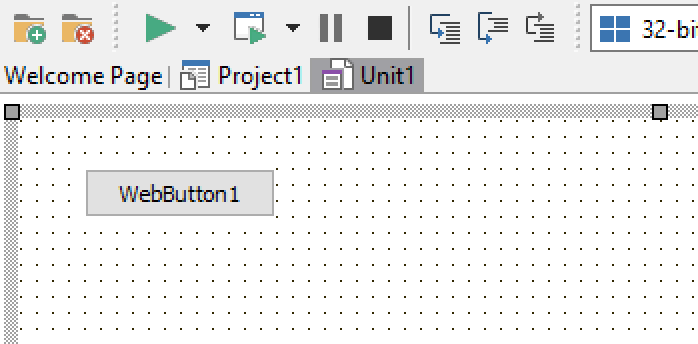
To answer the question, we will create a new TMS WebCore application, and drop a WebButton:
Then, we double click the button, and write the following code:
uses ... Web,...;
...
procedure TForm1.WebButton1Click(Sender: TObject);
begin
    window.open('http://localhost:8080');
end;
And that should be it! Now when you run the tms WebCore application and press the button, it should open the report. Note that of course the server must be running and listening in localhost:8080 for this to work.
2. A more complex integration
In the previous section we saw a very simple example on how to integrate reporting in WebCore. There was basically no integration between WebCore and FlexCel, and all the above can be resumed in the lines:
uses ... Web,...;
...
procedure TForm1.WebButton1Click(Sender: TObject);
begin
    window.open('http://localhost:8080');
end;
You could have used any other reporting solution here instead of FlexCel, and just have a webserver app exposing the reports as html or pdf. It doesn't get any simpler than this, and I believe this is a good thing. Calling window.open will probably be the most used way to show reports from a WebCore app.
But what if we wanted a little more integration? Well, you can do that too, and this is what we covered in the second demo. As for the first demo we had used PDF, on this second demo we will be showing HTML reporting. And while we could call the html reports also with window.Open as in the first case, here we want to integrate the report inside the TMS WebCore app.
2.1. Server Side
Server side, we are going to use the same template that we used in the first example, but export to HTML instead of PDF. We will use a FlexCelHTMLExport class instead of a FlexCelPDFExport class.
We are also going to embed the images in the HTML file (using HTML5) so we don't have to feed separated images and html to the html component that is going to display the report client side. We are also going ot set the image resolution to 192 dpi so the chart looks crisp in the generated file.
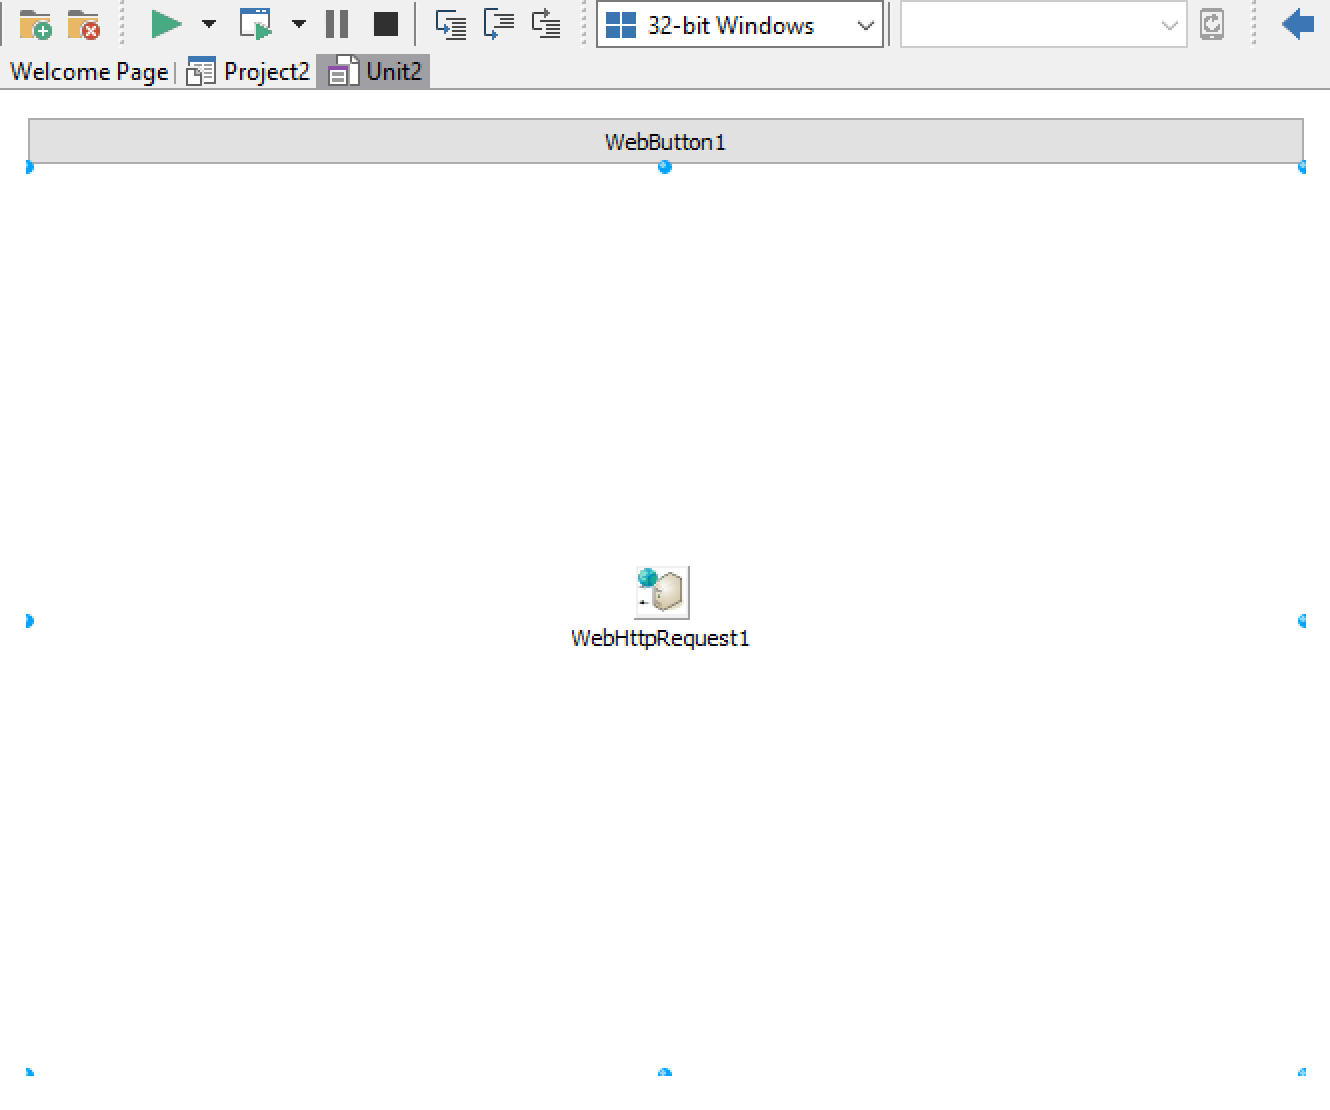
We are going to create a new TMS WebCore application, drop a button, a WebHTMLContainer, and a WebHTTPRequest component:
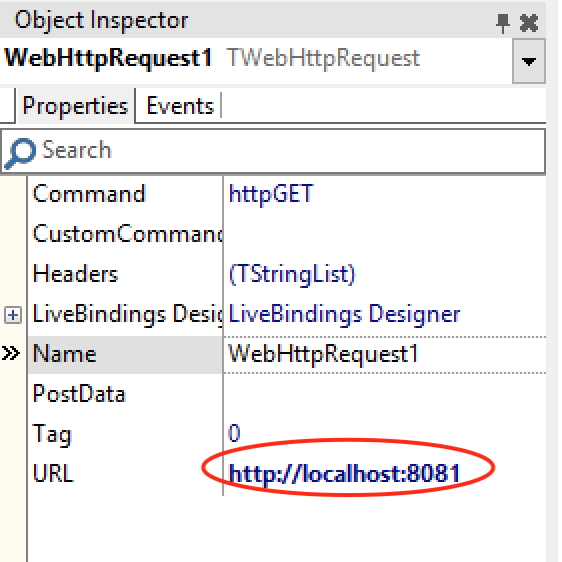
This time we are going to use the WebHTTPRequest component to get the report. WebHTTPRequest is async, so we need to call it from the button click event, and then when the answer data is available, load it into the WebHTMLContainer. The first step then is to set the server address in the WebHTTPRequest properties:
Note that for this example we will use port 8081 instead of 8080 as in our last example, so we can run both at the same time. This means that we also need to change our server app to serve in port 8081 instead of 8080.
Then, on the button click event let's call the WebHTTPRequest, and let's also write the Response event of the WebHTTPRequest so it fills the WebHTMLContainer with the data:
A last note. At the time of this writing, TWebHTMLContainer doesn't have a property to change how it handles overflow. But as TMS WebCore allows full control on the generated html and css, we are going to apply a little hack to make the WebHTMLContainer scrollable. We will edit the Project2.html file, and add the following to the head section:
This line will allow the container to scroll, and as it is defined as !important, it should overwrite other rules that make the container not to scroll. This should be just a temporary hack, until the WebHTMLContainer gets a property that allows you to manipulate this directly.
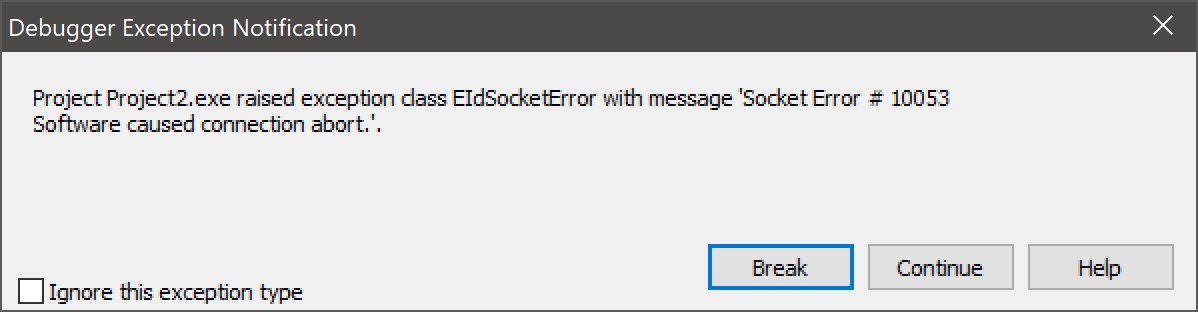
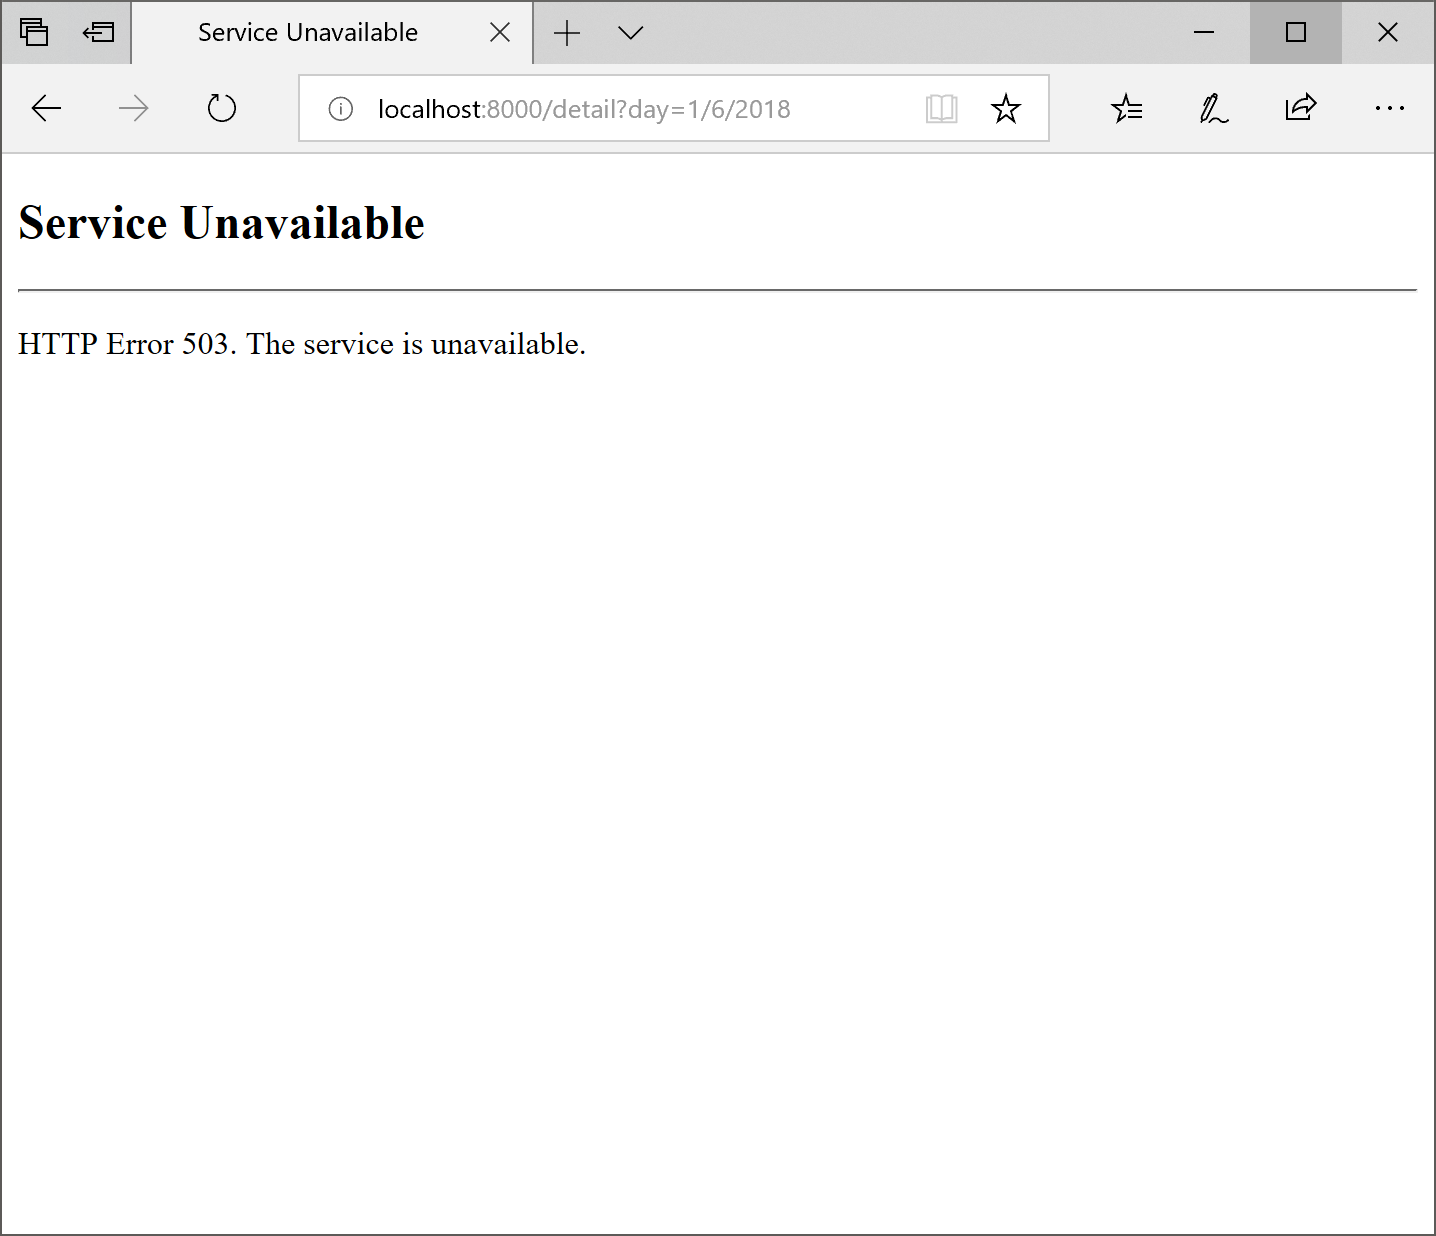
So after all of this, it is time to run the application! And we get...
CORS
What was that error? Everything was going so well! But let's not panic: The problem here is with something called Cross-Origin Resource Sharing (CORS)
Basically, we are trying to access a resource in the server (localhost 8081) from the client (localhost 8000) and this is not allowed by default. We need to specifically allow requests from localhost 8000 into the server.
With this fixed, we should now see the application working with the report embedded inside it:
3. Even more integration
We didn't got to cover this section in the TMS day, as it was already too much to say for 30 minutes, but I would like to mention it here anyway. The last example (the "integrated" one) does work, but it is not really ok. It is embedding a full HTML document (the one created by FlexCel) inside another HTML document (the TMS WebCore app), and that is not valid HTML. We could have used an iframe instead, but iframes are so ridden with security issues that it might be a solution worse than the problem.
To do a nice integration, we need to separate the HTML headers from the body. Luckily FlexCel HTML exporting was designed from the start to allow you to get the different parts of the html document so you can integrate the HTML output in your site.
3.1. Server Side
On the FlexCel side, we need to use a TPartialExportState object instead of writing directly to an html file. TPartialExportState allows us to get the different parts of a report instead of the full text.
The next thing is that while we want to separate the css from the html so we can write them in different places in the client, we would like to keep everything inside a single request to the server. So we will be sending an encoded response, where the first part is the css, then we have a 4-char 0 separator, and then we have the html. Client side, we will separate this response back to the 2 original parts, and write them in the correct places.
So server side, the code ends up as follows:
procedure TWebModule1.WebModule1DefaultHandlerAction(Sender: TObject;
  Request: TWebRequest; Response: TWebResponse; var Handled: Boolean);
var
  Report: TFlexCelReport;
  Xls: TExcelFile;
  Ts: TMemoryStream;
  Writer: TStreamWriter;
  Html: TFlexCelHtmlExport;
  HtmlState: TPartialExportState;
begin
  Response.SetCustomHeader('Access-Control-Allow-Origin', '*');
  Response.SetCustomHeader('Access-Control-Allow-Headers', 'X-Custom-Header, Cache-Control');

  Report := TFlexCelReport.Create(true);
  try
    Report.AddTable('data', datamodule1.data);

    Xls := TXlsFile.Create('......why.xls', true);
    try
      Ts := TMemoryStream.Create();
      try
        Writer := TStreamWriter.Create(Ts, TEncoding.UTF8);
        try
          Report.Run(Xls);
          Html := TFlexCelHtmlExport.Create(Xls, true);
          try
            Html.HtmlVersion := THtmlVersion.Html_5;
            Html.EmbedImages := true;
            Html.ImageResolution := 192;
            HtmlState := TPartialExportState.Create(TFlexCelWriter.Null, '');
            try
              Html.PartialExportAdd(HtmlState, 'report.html', '', true);
              //We will encode the css and body in the same Response.
              HtmlState.SaveCss(Writer);
              Writer.Write(#0#0#0#0); //Use 4 character 0 as separator between CSS and Body.
              HtmlState.SaveBody(Writer, 1, '');
            finally
              HtmlState.Free;
            end;
          finally
            Html.Free;
          end;

          Response.ContentStream := Ts;
        finally
          Writer.Free;
        end;
      finally
      //don't free the content stream
       // Ts.Free;
      end;
    finally
      Xls.Free;
    end;
  finally
    Report.Free;
  end;

end;
This code will output the css , then the separator #0#0#0#0, then the html.
3.2. Client Side
Client side, we need to re-separate the css and the html, then output the html into the Text of the WebHTMLContainer, and the css into the header of the page.
To output the html, we will use the same code as in the last example. To output the css, we will use the method AddInstanceStyle in TControl. Since this method exists only in web controls but not in normal Win32 controls, we need to write the method inside {$IFNDEF Win32} defines.
There is one last issue to address: FlexCel returns the full css including the enclosing <style> and </style> tags. But AddInstanceStyle expects the inner HTML without the <style> tags. So for this example, we just had to do some poor man's parsing and manually remove the <style> and </style> tags in the css returned by FlexCel. This should not be necessary in the future, since for FlexCel 6.20 we are adding a new overload TPartialExportState.SaveCss which has a parameter includeStyleDefinition. Once we release 6.20, you will be able to just call SaveCss with includeStyleDefinition = false, and there will not be a need to remove it manually to call AddInstanceStyle.
So finally, the code in the client ends up like this:
procedure TForm1.WebHttpRequest1Response(Sender: TObject; AResponse: string);
var
 cssPos: integer;
 cssString: string;
 innerCssStart, innerCssEnd: integer;
begin
  WebButton1.Enabled := true;
  cssPos := Pos(#0#0#0#0, AResponse);
  if (cssPos < 1) then
  begin
    ShowMessage('Invalid response from server');
  end
  else
  begin
      ShowMessage('Ok!');
  end;

  WebHTMLContainer1.HTML.Text := copy(AResponse, cssPos + 4, Length(AResponse));
  cssString := copy(AResponse, 1, cssPos - 1);
  innerCssStart := pos('>', cssString) + 1;
  innerCssEnd := pos('', cssString);
  {$IFDEF WIN32}
  ShowMessage(copy(cssString, innerCssStart, innerCssEnd - innerCssStart));
  {$ELSE}
  WebHTMLContainer1.AddInstanceStyle(copy(cssString, innerCssStart, innerCssEnd - innerCssStart));
  {$ENDIF}
end;
With this code, the document should be a valid html document, with the css in the header and the html for the report inside the div. The results will look similar as in example 2, but the html is now correct.
4. Hyperlinks
Ok, why stop now? There is still so much to cover! But well, I only had 30 minutes to speak so in the TMS day I stopped in the second demo. In this post we have a little more time, so I'll cover one big pink elephant in the room I managed to ignore up to now: Hyperlinks.
HTML is supposed to be about hyperlinks, it is right there on the first "H" in HTML. Wouldn't it be cool if we could add hyperlinks to our reports? I will answer this for you: indeed it would be cool. We could do for example a drill down report where we list the whys per day as in the previous examples, but when you click on a date, you can see a detail on how the whys evolved during that day. And this is exactly what we are going to try to do in this part.
4.1. Server Side
Server side, we will have to modify our template, and add a new one for the details. We will rename why.xls to why-master.xls, and add an hyperlink at cell A3. The hyperlink will have as target the URL:
As in Excel you can't write FlexCel tags like <#data.measureddate> inside an hyperlink, FlexCel allows the alternative syntax *.data.measureddate.* instead, and that is what we used above.
We also used a bogus domain name, tmsexample.com because Excel only understands absolute hyperlinks. When exporting to html with FlexCel, we will set the BaseUrl property in the FlexCelReport component to:
html.BaseUrl := 'http://tmsexample.com';
and that will make the url relative by removing the start of it. We could have used any other domain name here, the only thing required is that we use the same name in the template and in the BaseUrl property.
We will also create a why-template.xls which is similar to the master, but with different formatting and a link to go back in cell A1 instead of a link to drill down in cell A3.
Next step would be to add a new DataSet to the datamodule to do the query for one day, instead of the query grouped by days that we had before.
And finally, the server now needs to handle requests for the detail and for the master. We will do this by adding a new action to the webbroker module:
The actions now are like this:
procedure TWebModule1.WebModule1DefaultHandlerAction(Sender: TObject;
  Request: TWebRequest; Response: TWebResponse; var Handled: Boolean);
begin
  RunReport('why-master.xls', datamodule1.data, TDateTime(0));
end;

procedure TWebModule1.WebModule1DetailHandlerAction(Sender: TObject;
  Request: TWebRequest; Response: TWebResponse; var Handled: Boolean);
var
  date: TDateTime;
  day: string;
begin
  day:= Request.QueryFields.Values['day'];
  date := Trunc(StrToDate(day));
  DataModule1.detail.Parameters.ParamByName('day').Value := date;

  RunReport('why-detail.xls', datamodule1.detail, date);
end;
Where "RunReport" is a generic method that is more or less similar to the previous examples. We are not going to show it here since it is not interesting, and as with the other examples, the full source code is at the end of this post anyway.
Note: In this particular case I am using the dates without any preprocessing as parameters for the detail report, but this is far from ideal. You can never know if 1/3/1999 is March 1 or January 3, and client and server might understand dates differently, so the best solution is to use a neutral format like "yyyy-mm-dd" or even the date serial number. But to keep this example simple, I just used the localized dates as parameters.
With these modifications, if you now run the server app, you should see a screen like this:
And if you now click on a date, say January 8, you should see the details for that day:
You can click in the arrow at the top to go back to the main report.
4.2 Client Side
Finally, the last thing to study is how to make this work as a TMS WebCore application. At first sight, we might think that the application from the last example should work: after all the master report has relative links to the details, and the details to the master, so it all should work transparently. It is already working if you call the webpages directly.
But, if you try the application, you will notice that the master report loads fine, but when you click on the links, you get an error:
The explanation on why this is happening is simple, but it might not be completely intuitive. If you look at the Url in the previous screenshot, you'll see it points to http://localhost:8000/detail?day=1/6/2018. But the server is running in port 8083, so that is why the error. The relative Url in the report is being resolved with the address of the client, not the server.
The approach here works for a separate report (one that you would open with Window.Open) but it just won't work for reports that are integrated in the app. For that, we need to dig a little bit further.
5. Hyperlinks in integrated reports
As we have seen in point 4, when running integrated reports, we can't just have the reports link to other subreports. Those links would take us away from our app, which is running as a single page in the client.
What we need to do is to convert those links in the master report to javascript calls, and then modify our app to handle those javascript links and open the correct report inside our application.
5.1. Server side
Server side, we now need to generate Javascript links, not links to a different page.While we are at it, we will use the date serial number instead of the date string as the parameter, as to avoid the problem of what date is "1/2/1999" which we mentioned in the previous section.
As the expression in the hyperlink is going to get a little complex, we are going to start by creating a config sheet in the master report template. A config sheet is just a special sheet in a FlexCel report where you can define a lot of the stuff that goes into the report. In our case, we are going to add an expression named detaillink which we will define as:
Then we will edit the hyperlink itself, and change it to be:
http://tmsexample.com/*.detaillink.*
Different from the previous example, now the logic on what goes in *.detaillink.* is now encapsulated in the config sheet, and we can now play with its definition without having to edit the link
The rest of the application is going to be the same as in our last example, but with a small meaningful difference. This time we are going to add a slash at the end of the BaseUrl property.
html.BaseUrl := 'http://tmsexample.com/';
That extra / at the end will make sure we remove the starting / in the url, and end up with links like
href="javascript:pas.Unit5.Form1.OpenDetail(43104);" instead of
href="/javascript:pas.Unit5.Form1.OpenDetail(43104);"
We will do similar modifications to the detail template, so the links call an OpenMaster() javascript method.
5.2. Client Side
Client side is where we have to do more changes. Server side, we are now generating links which call some "OpenDetail" and "OpenMaster" methods in javascript, and pass the serial number of the date as the parameter for OpenDetail. We now need to define those functions in Javascript.
Luckily TMS WebCore makes it simple. We are going to just define two new pascal methods as follows:
And make them part of the published interface of the class.
Now, when we get a link like "javascript:pas.Unit5.Form1.OpenDetail(43104)" from the report, the browser will call the method OpenDetail in our code, and pass 43104 as a parameter. As you could see in the code above, we use that parameter to fetch the correct report from the server, and then it is loaded as any other report.
So to round it all up, and as this is a blog about a tms day, below you can see a small video showing how this small reporting app ended up working:
The future
I wasn't originally planning to speak about the future when I started preparing the presentation, as I was just planning to keep FlexCel server only. But as I mentioned at the start, after speaking with people on the TMS day I got convinced that we need to do more with FlexCel in the Javascript front end.
So where do we start? To be realistic, there is little chance that FlexCel will be compiled with TMS WebCore in the near future. FlexCel uses a lot of generics and other stuff that is not supported by the pascal to js compiler, and to be 100% sincere, we can't even compile FlexCel with Lazarus which supposedly has the features we need. (and believe me, we've tried).
But FlexCel is not only FlexCel for Delphi. We also have FlexCel for .NET which could be converted to asm.js or webassembly. Once it is javascript, it doesn't matter if we started from Pascal or C# code, it will work the same.
FlexCel .NET could be an option. But in this TMS day we introduced another possibility, which seems likely to be the one that wins. You know, there has been a third branch of FlexCel living a "secret" life since 2015. This branch is fully written in C++ 11, and C++ converts pretty well to Webassembly. I said it on tms day and I will say it again now: There is no guarantee that FlexCel for C++ will ever reach a stage where we release it. Please don't wait for it. Our priorities are in FlexCel itself, right now more specifically in FlexCel 7 which will have xlsx chart rendering and will let us do the same demos we did here with xlsx files instead of xls and still show the charts. FlexCel C++ is a side project, which gets time only when there isn't anything more urgent, which is very little time.
Now, with the disclaimer out of the way, FlexCel for C++ is actually working for small cases, and the conversion to Webassembly was so seamless that it looked like magic. So I really wanted to show it working. We took some small tests which are passing in C++, compiled them with Webassembly, and saw the results. I am not going to replicate what we did there, as the post would get too long, but I just want to share some screenshots with the final results.
This is the tests running in C++:
And here they are running in node.js:
Yes, they look the same, and no, they aren't even remotely similar. One is running compiled C++ code in a mac, the other is javascript running under node.js. And the tests aren't trivial either, they are reading and creating xlsx files already. And yes, if I change the code, I can see the assertions break in both C++ and Javascript; we did that live on tms day. It does seem kind of magical to me.
So this are the plans, or maybe the dreams right now. What the future will actually bring nobody knows, but it feels good to share those dreams with you. With a little more bit (actually a lot) of effort they could actually come true. I know I am really looking forward to have C++ and Webassembly versions of FlexCel.
Q & A
Sadly this time we didn't got time to do a Q&A, and I feel sad about it. Q&A are the parts that I enjoy more on the presentations. To make up for it, please ask your questions in the comments!
Compilation Directives could help you to make your code multi-platform or even cross-compiled.
Introduction
Compilation directives are powerful commands that developers could use to customize how the compiler works.
These directives pass parameters to the compiler, stating the arguments of the compilation, how must be compiled, and which will be compiled.
There are basically 3 types of compilation directives.
Switch directive
Parameter directive
Conditional compilation directive
The first two types change the compile parameters, while the last one changes what the compiler will perform on.
In this article we will deal with the last one: Conditionals.
Conditionals
They are powerful commands.
With just a few conditional commands, your Object Pascal code can be compilable across multiple platforms.
However, as we add more and more directives, the code will become more complex.
Let's take a look in the example below:
 //http://docwiki.embarcadero.com/RADStudio/Tokyo/en/Conditional_compilation_(Delphi)
  {$DEFINE DEBUG}
  {$IFDEF DEBUG}
  Writeln('Debug is on.'); // This code executes.
  {$ELSE}
  Writeln('Debug is off.'); // This code does not execute.
  {$ENDIF}
  {$UNDEF DEBUG}
  {$IFNDEF DEBUG}
  Writeln('Debug is off.'); // This code executes.
  {$ENDIF}
In this example, only the first and third Writeln function calls will be executed.
All directives and also the second function call won't be part of the final executable, I mean, the ASSEMBLY code.
Cool.
However, it looks like that the code is "dirty" and also we have a temporal coupling, because the constants need to be defined in a specific order.
Directives and definitions of constants that will be used in only a single unit may even be manageable, but what if you will work with tens or even hundreds of units that will use these directives and definitions, do you still think this approach is the best choice for the architecture of your project, with the purpose of building it as cross-compiled or multi-platform?
I don't think so.
Encapsulating Directives
Imagine a project that needs to be cross-compiled in Delphi and Free Pascal. We would like to use the same classes, the same code, but could exists some differences between these compilers.
The code needs to evolve independent of the compiler. I mean, if some changes could be done to improve the code when it is compiled on Free Pascal, for example, it should be done without thinking in some difference that might exist in Delphi.
To do so properly, we could not work in a code with many compilation directives, because some changes could broke the Delphi version or vice-versa.
Instead of seeing directives, it might be better seeing just classes.
I would called this, encapsulated directives.
Implementation
Imagine an unit witch contains a class to represents a MD5 algorithm.
Free Pascal already has a md5 unit which has functions to do the job and of course we have to make classes to encapsulate those functions.
In Delphi, the unit that do the same job is named hash.
We do not want to "reinvent the wheel" then, let's use what is already done on both platforms.
So, how would you do this implementation neither using conditional directives in implementation code nor *.inc files?
First of all, let's create our MD5 unit:
unit MD5.Classes;

interface

uses
  {$ifdef FPC} MD5.FPC {$else} MD5.Delphi {$endif};

type
  TMD5Encoder = class(TEncoder);

implementation

end.
As you can see, there is almost nothing on this unit. The real code will stay in others units, i.e, MD5.FPC and MD5.Delphi, one for each platform.
Let's create the FPC version:
unit MD5.FPC;

interface

uses
  md5;

type
  TEncoder = class
  public
    function Encode(const Value: string): string;
  end;

implementation

function TEncoder.Encode(const Value: string): string;
begin
  Result := MD5Print(MD5String(Value));
end;

end.
Those functions with prefix "MD5" comes from md5 unit.
Then, let's create the Delphi version:
unit MD5.Delphi;

interface

uses
  hash;

type
  TEncoder = class
  public
    function Encode(const Value: string): string;
  end;

implementation

function TEncoder.Encode(const Value: string): string;
begin
  Result :=THashMD5.GetHashString(Value);
end;

end.
Both units have the TEncoder class definition (yes, same name in both). Then, we created a TMD5Encoder class that inherits from the correct class, which is platform dependent, and voila! We have clean units, without any conditional directives inside methods.
Finally, we have two distinct classes in different units that can evolve its implementation independently, without any fear of breaking the code between platforms.
Conclusion
Compilation directives is a good tool for customize the code. However, it should be used with parsimony.
In object-oriented code, try to use more specialized objects than compilation directives.
For each conditional directive that you want to add to the code, I suggest implementing a new class that encapsulates the directive or a set of them.
With almost all in the TMS development team and since some time also many TMS ALL-ACCESS users busy using TMS WEB Core to develop web client applications from the Delphi IDE, we wonder about what could be the preferred developer experience to deal with run-time errors?
To situate, there are different categories of errors, but to focus we'll divide the types of errors in two categories:
Delphi code causing exceptions
DOM manipulations causing errors
A Delphi code exception is for example an out of bounds access in an array. A DOM error is for example accessing a non-existing attribute of a HTML DOM element or a network error. The standard behavior in the browser is that the error is displayed in the console. To see the error, the developer needs to open the console (for example with the F12 in the Google Chrome browser). When not looking in the console, errors go in many cases unnoticed.
As a software developer, we're interested in all sorts of errors so we can locate the cause and apply fixes to avoid the errors. From the feedback of several users already busy with TMS WEB Core, we learned that in many cases an unexpected behavior is reported but it is overlooked to look in the console to get more details about what exactly might have happened. This made us reflect on how we can do better to make it clear to developers that an error happened in the web application. There are several possibilities and perhaps there are even more we didn't think about yet.
For an error, like an out of bounds exception that looks in the console like:
some alternative possibilities are:
1) Show the error as an alert (modal dialog in the browser):
Advantage is that it is blocking and thus can't be ignored but the position of the alert is controlled by the browser and somewhat awkward. Disadvantage is that we need to click the dialog away for every error that happens.
2) Show the error with a nicer TMS WEB Core dialog that makes it more clear it concerns an error:
Advantage is that it is centered in the window and cannot be misinterpreted that it concerns an error. Disadvantage here is also that we need to click the dialog away for every error that happens.
3) Show the error in a red colored area at the bottom of the browser window:
Advantage is that it is less intrusive and the red colored area can host multiple errors simultaneously when it grows.
4) Let the developer decide what to do from the Application object OnError event:
procedure TForm1.AppErrorHandler(Sender: TObject; AError: TAppplicationError;
  var Handled: boolean);
begin
  ShowMessage(AError.AMessage+#13+AError.AFile+#13+inttostr(AError.ALineNumber)+':'+inttostr(AError.AColNumber)+#13+AError.AStack);
end;
5) Show the error in the Delphi IDE:
This is far from trivial but we have some experimental code & proof of concepts that could make this perhaps in the future also a feasible solution.
6) Other solutions?:
Perhaps there are other possibilities we didn't think about yet, so we're curious to hear your thoughts!
We had some internal discussions with the development team here and there are different opinions. So, therefore, we wonder what your thoughts are and what you think is the preferred way to handle errors for your Delphi web client applications. Note that the default behavior could even be different in DEBUG mode from RELEASE mode.
You can vote here what your preferred error handling method is or you can leave comments on this blog:
TMS Analytics & Physics developing library supports operations with array and matrix variables and includes special package of linear algebra functions. New version 2.5 introduces many capabilities and improvements for linear algebra operations.
First, new operators introduces specially for vector and matrix operations: cross product operator ×, matrix inverse operator `, norm operator ||. In previous version of Analytics library matrix multiplication with standard linear algebra rules were implemented using multiply operator *. In new version matrix-matrix and matrix-vector multiplication implemented using the cross product operator, and the multiply operator used for by-element multiplication. This leads to more compliant algebra rules: multiply operation is always commutative, as for numbers as for matrices and vectors, and the cross operation is not commutative. By the same reason, the inverse operation used now for calculating inverse of square matrices, as the division operation now is always by-element one (so, the division operation is the inverse of multiplication). The norm operator evaluates the L2 norm of vectors and matrices, and the absolute operator || used for evaluating absolute values of vector and matrix components.
Let us consider the difference between multiplication operator and cross operator with the simple example. Suppose there are the following two matrix variables:
As can be seen from evaluation result, the first operation implemented with standard linear algebra rules for matrix product (https://en.wikipedia.org/wiki/Matrix_multiplication), as the second operation is just by-element multiplication of the matrices. The latter operation frequently used in signal and image processing algorithms (https://en.wikipedia.org/wiki/Hadamard_product_(matrices)). Combination of both operations can be used in one expression.
In addition to the operators, new functions for matrix arguments have been introduced in Linear Algebra package: trace of a square matrix tr(M), determinant of a square matrix det(M), adjoint of a square matrix adj(M), condition number of a square matrix cond(M), pseudo-inverse of a rectangular matrix pinv(M).
The second improvement concerns symbolic capabilities for vectors and matrices. In previous versions, the only way of using arrays in formulae was introducing variables for them. The version 2.5 allows using explicit vector and matrix expressions in any symbolic formula. Example of simple vector expression with four components [sin(x) cos(y) e^-x a*b]. Matrix expressions are 2D rectangular arrays of expression elements. For example, [[i j k] [sin(a) cos(a) -1]] is a 2x3 matrix expression.
Vector and matrix expressions can be used in formulae like vector and matrix variables. The difference is that the former are unnamed but their components can depend on other variables. Thus, we can calculate symbolic derivatives of the expressions. For example, the derivative of the above vector expression by x is [cos(x) 0 (e^-x) 0].
For evaluating values of vector and matrix expressions, all their components must have the same type. The component types supported are: Boolean, Real and Complex.
As example of evaluating vector expressions let us consider the following problem: there is the array A with four components and we need to calculate new array, selecting components from the A by different four conditions. For solving this problem we can use vector form of if function. The expression can be the following: if{[a>1 b<3 a-x>0 b+x<2]}(A [-1 -2 -3 -4]). Here the condition of the if function defined by the vector expression with four Boolean expression components, depending on other variables: a>1, b<3, a-x>0 and b+x<2. The arguments of the functions are array variable A and vector expression with four real components. Evaluating the expression with some given variable values, we get the following result:
x = 1.5
a = 1
b = -2
A = (1 0.5 0.25 0.125 )

if{[a>1 b<3 a-x>0 b+x<2]}(A [-1 -2 -3 -4]) = (-1 0.5 -3 0.125 )
The example demonstrated that vector and matrix expressions can be used together with array and matrix variables and, in some cases, they are more flexible, because their components can depend on other variables.
These new improvements of linear algebra capabilities allowed realizing vector basis for linear least squares approximation. Here is the source code of an approximation example using the vector basis:
var
  approximator: TLinearApproximator;
  basis: TLinearBasis;
  func: string;
  parameters: TArray<TVariable>;
  exponents, cValues: TArray<TFloat>;
  A: TVariable;
  dim, order: integer;
begin
  // Setting parameters for approximation.
  dim:= 1; // One dimension.
  // exponent values
  exponents:= TArray<TFloat&ht;.Create(0.0, 0.5, -0.5, 0.7, -0.7);
  order:= Length(exponents); // Basis order is the size of the array.
  // Vector variable for exponent array.
  A:= TRealArrayVariable.Create('A', exponents);
  parameters:= TArray<TVariable>.Create(A); // Parameters for Vector basis.
  func:= 'e^(A*X[0])'; // Vector function for basis - returns real vector.

  // Create the basis with the specified function and parameters.
  basis:= TLinearVectorBasis.Create('X', 'C', order, dim, parameters, func);

  approximator:= TLinearLeastSquares.Create; // Linear approximator.
  // Calculate the optimal basis coefficients.
  cValues:= approximator.Approximate(basis, vData, fData);

  // Using the approximation (basis with optimal coefficients)...
end;
As can be seen from the code, approximation basis function has very compact form e^(A*X[0]), because it uses vector variable A and so, the return value of the function is real vector. The result of the approximation for some given data is the following:
Simple basis function expression (in vector form).
Easily create high-order basis (using big array parameter).
Use arbitrary coefficients for the basis (fractional exponents, powers and so on).
Change the basis without changing the function (use other values of the parameter array A).
In addition to the vector and matrix expressions, there are some other symbolic features in the version 2.5. One feature is calculating symbolic expression for n-order or mixed derivative with one function call. The code below calculates mixed derivative of a complicated expression:
var
  translator: TTranslator;
  F, Dxy: string;
begin
  translator:= TTranslator.Create;

  F:= '(y-A*ln(y))/x+B*(v(x+y))^(2/Pi)';
  Dxy:= translator.Derivative(F, TArray<string>.Create('x','y'));

  // using mixed derivative Dxy...
end;
Note, that after derivative evaluation the result expression simplified. New simplifications in version 2.5 are: put minus operator under sum and product expressions (first expression in the sum (-1+A/y)/x^2); simplification of square root and power expressions (second expression in the sum B*(1/p-1)*(x+y)^(1/p-2)/p).
Finally, there is new symbolic function that allows getting all variable names from math expressions. Here is an example of using the function:
var
  F: string;
  Names: TArray<string>;
begin
  F:= 'A[i]*sin(2*Pi*x)+A[j]*cos(2*Pi*y)+B[i]*e^((1+I)*x)+B[j]*e^((1-2I)*y)';
  Names:= TTranslator.VariableNames(F);

  // using the Names array...
end;
The result is the following:
F = A[i]*sin(2*Pi*x)+A[j]*cos(2*Pi*y)+B[i]*e^((1+I)*x)+B[j]*e^((1-2I)*y)
Variable names: A, i, x, j, y, B
Note, that the function does not include variable names in the result twice (i, j, x, y, A, B). In addition, standard constants, like Pi and Euler number, not included in the names list.
The version 2.5 is already available here. Source code of the example application can be downloaded from here. Other examples of using vector/matrix operations, expressions and vector basis with graphics visualization included in demo projects of the version 2.5.